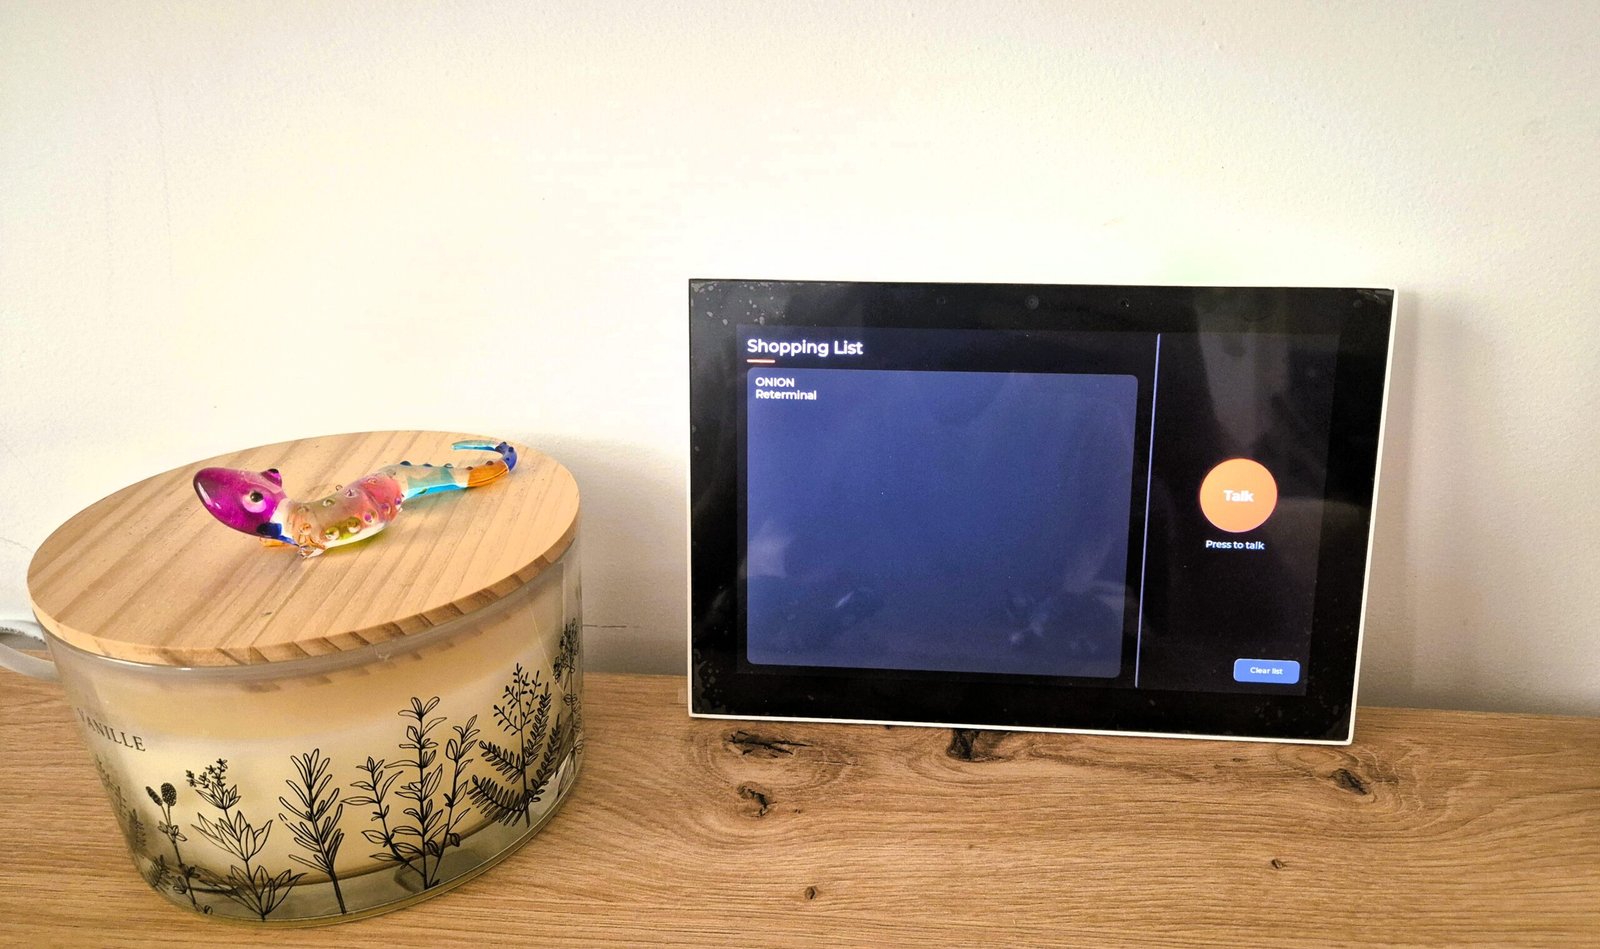
One of the things I always wanted since setting up my own Home Assistant server was a shopping list where I could easily add items by voice, edit them, and have it synced with my smartphone so I could check it from the supermarket. And all of this without depending on Alexa.
In this post I’ll explain how I built my own using a reTerminal D1001.
Why I stopped using Alexa for the shopping list
When I tried adding Alexa to Home Assistant, I always ran into problems. Ever since they cut part of its integration with Home Assistant, you have to rely on several skills to get it working, and it never quite worked well for me. I tried the AnyList skill, but it kept failing, adding items to Alexa’s own shopping list instead of AnyList’s.
So I decided to build my own device to display the Home Assistant shopping list, be able to add products quickly by voice, and have them available later from my smartphone.
The advantage of this setup is that the shopping list is managed directly from Home Assistant, without depending on Alexa or an external app like AnyList.
How the voice shopping list in Home Assistant will work
The way it works is pretty simple. I’ll use the reTerminal D1001 as a physical interface for Home Assistant. It’ll show a simple GUI where you can see the shopping list, with two buttons: one to start the voice assistant and another to clear the shopping list. Here’s how it works:
When you press the voice button, the device sends the audio to Home Assistant, where Whisper converts your voice into text. Home Assistant interprets the command and directly modifies the todo.shopping_list entity. Piper is then used to reply by voice.
When you press the button to clear the shopping list, a script runs that deletes the shopping list in Home Assistant.
I’ll add more things to the GUI later, but for now this is the main functionality I need.
Hardware used: reTerminal D1001
The reTerminal D1001 from Seeed Studio is a pretty useful piece of integrated hardware if you’re looking for a dedicated touch panel for Home Assistant, but it’s not your typical “plug and play” product. The good part is that, hardware wise, it’s quite powerful for its price. The 8 inch IPS screen looks great, touch response is fast, and everything is controlled by its ESP32 P4 + C6 microcontrollers.
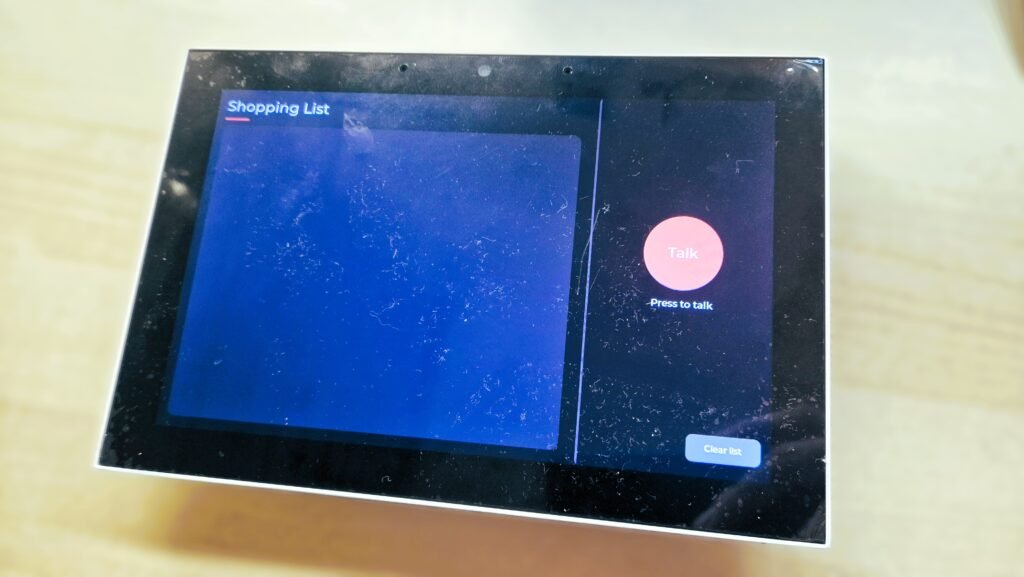
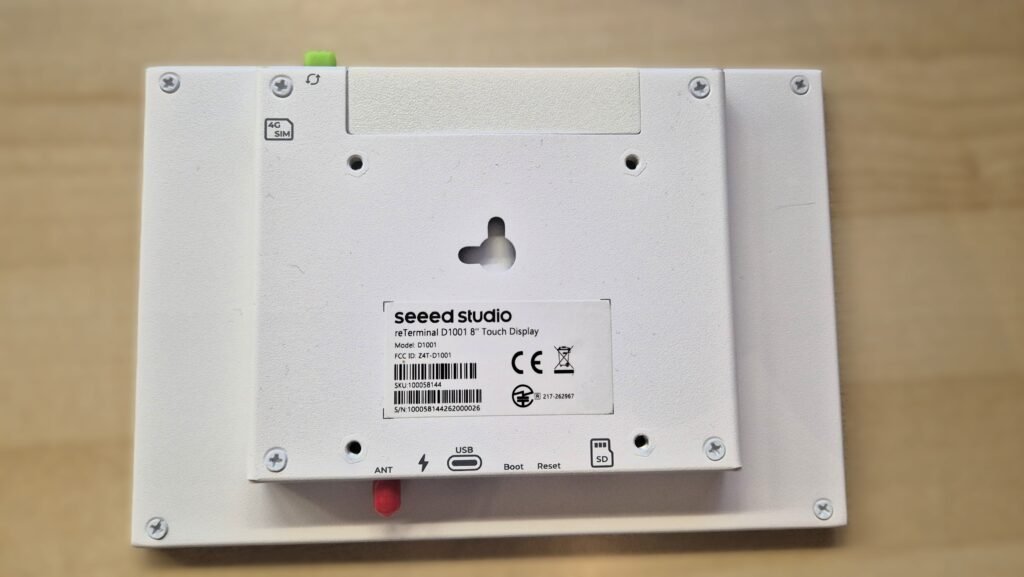
The downside is that it’s really designed more as a devkit. The firmware it ships with is just a demo, so you’ll need to get your hands dirty with ESPHome, compile your own YAML, and tweak a script or two. If you enjoy tinkering and you’re looking for a solid alternative to the typical cheap tablets in terms of power consumption, it’s a good option, even if it takes more work.
Purchase link: [LINK]
Prerequisites in Home Assistant
Before starting, we need a todo type entity already configured in Home Assistant for the shopping list.
Go to Settings → Devices & Services → Entities. Look for the todo.shopping_list entity. Its configuration should have the Entity ID set as todo.shopping_list
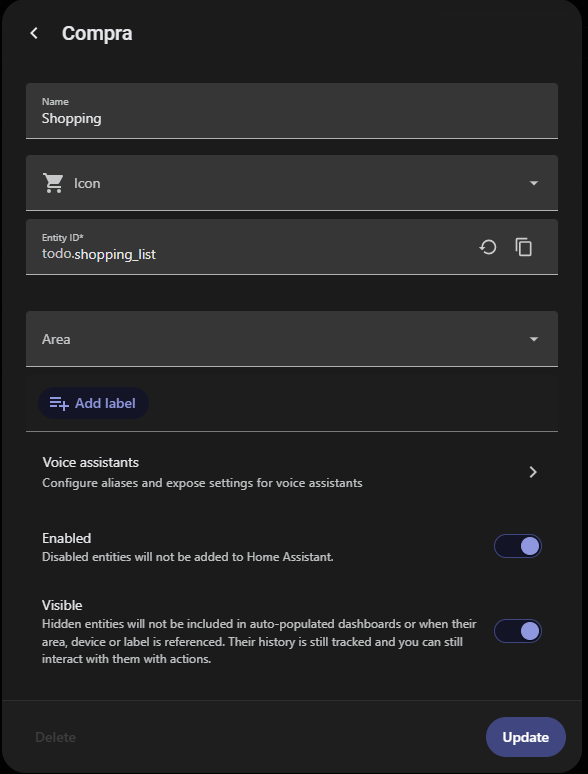
It’s a good idea to also give it a short name, since we’ll use it later in our voice commands to add items.
If you don’t see any todo.* entity, it means the “Shopping List” integration hasn’t been added yet: Settings → Devices & Services → Add Integration → search for “Shopping List”.
Installing ESPHome on the reTerminal D1001
To flash the reTerminal D1001 you’ll need the ESPHome Builder add on. I won’t cover how to install it, since there are already several guides for that.
- Open ESPHome and create a new project
- Select esp32 p4 as the Board.
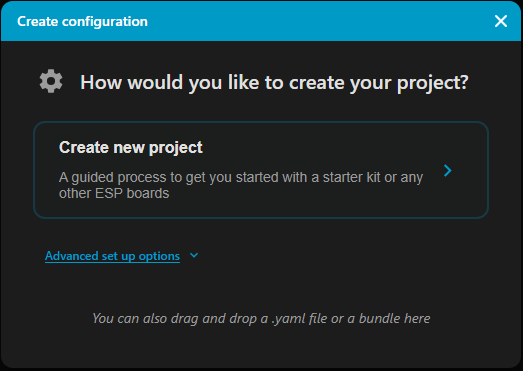
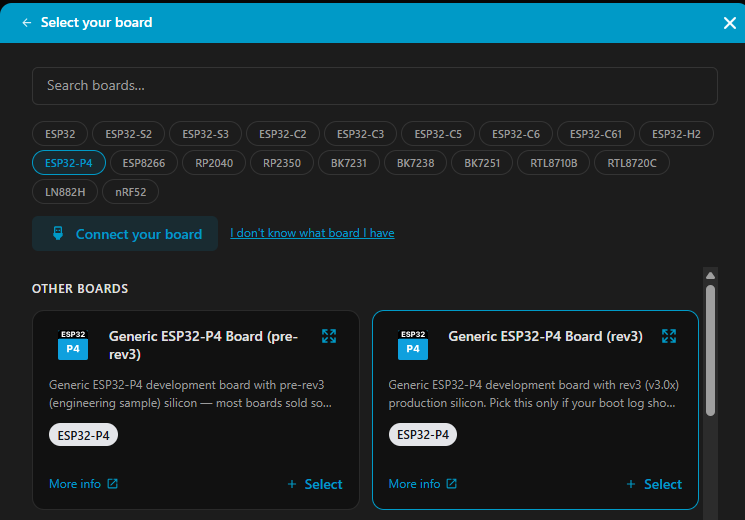
Type in the device name and click Finish. Once it’s set up, paste the YAML available in the repo below on the right side. Make sure to define the wifi_ssid, wifi_password and api_key variables in your secrets.yaml file.
>> https://github.com/myembeddedstuff/ReTerminalD1001-HomeAssistant-VoiceShoppingList
Once configured, click Save and then Install. After the firmware compiles, you’ll be able to flash it over USB.
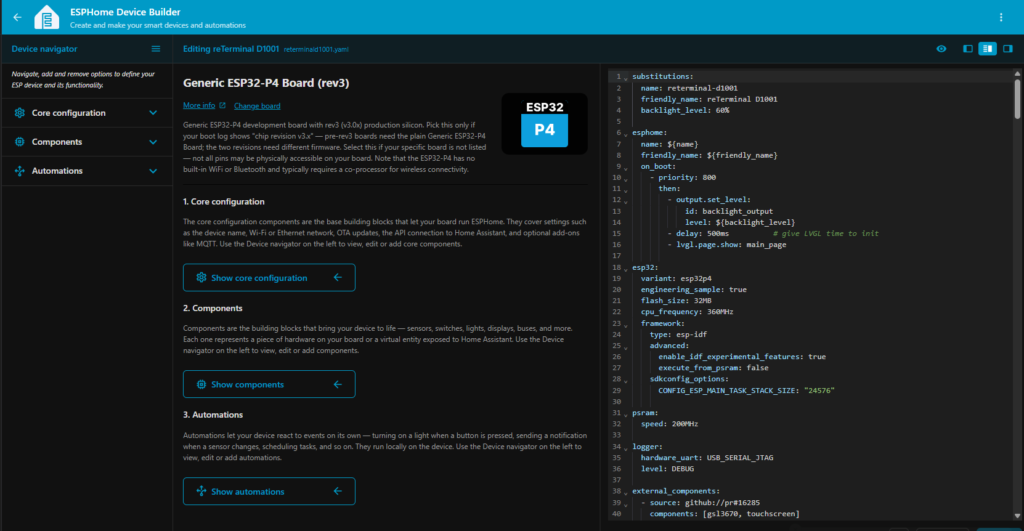
Installing Home Assistant Whisper and Home Assistant Piper for voice commands
For voice processing we need an STT engine (Speech to Text) and a TTS engine (Text to Speech).
In Home Assistant, the recommended ones are Whisper (STT) and Piper (TTS).
Installing Whisper in Home Assistant
To install it, follow these steps:
Go to Settings → Add ons and install Whisper. Make sure to enable Start on Boot and Watchdog for both. Next, integrate the add on in Settings → Devices & Services.
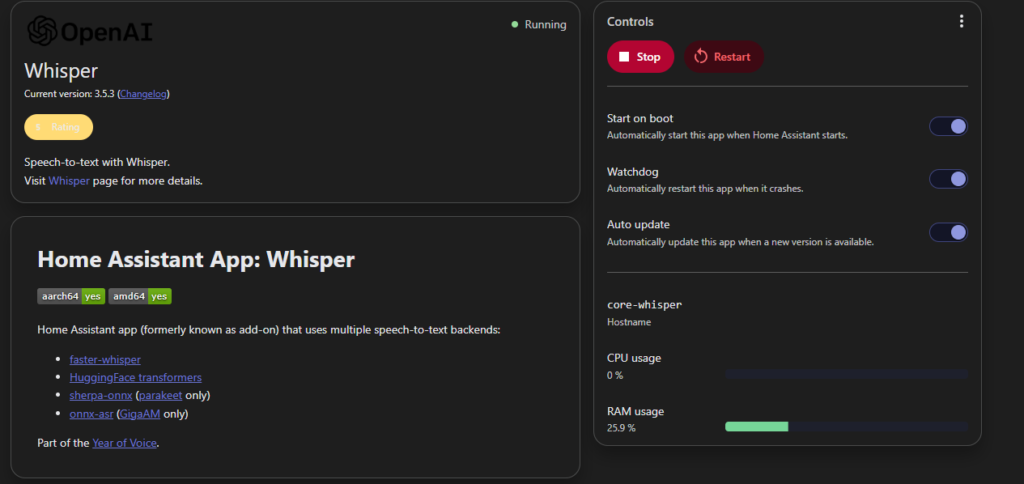
It’ll usually show up under Discovered. If not, click Add Integration and search for it manually.
If it asks for a Hostname and Port:
- You can check the Hostname in the add on’s own info tab.
- Whisper Port: 10300
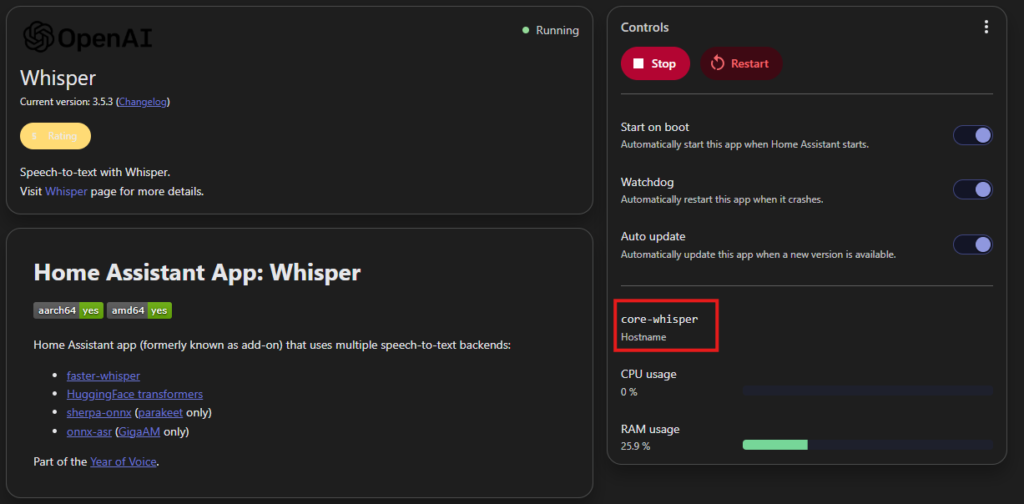
As a recommendation, once you install Whisper, go to Settings → Application and open its Configuration view. I’d recommend the “base” model, which improves transcription accuracy when you speak. Also, make sure to select your language.
Installing Piper in Home Assistant
To install it, follow these steps:
Go to Settings → Add ons and install Piper. Make sure to enable Start on Boot and Watchdog for both. Next, integrate the add on in Settings → Devices & Services.
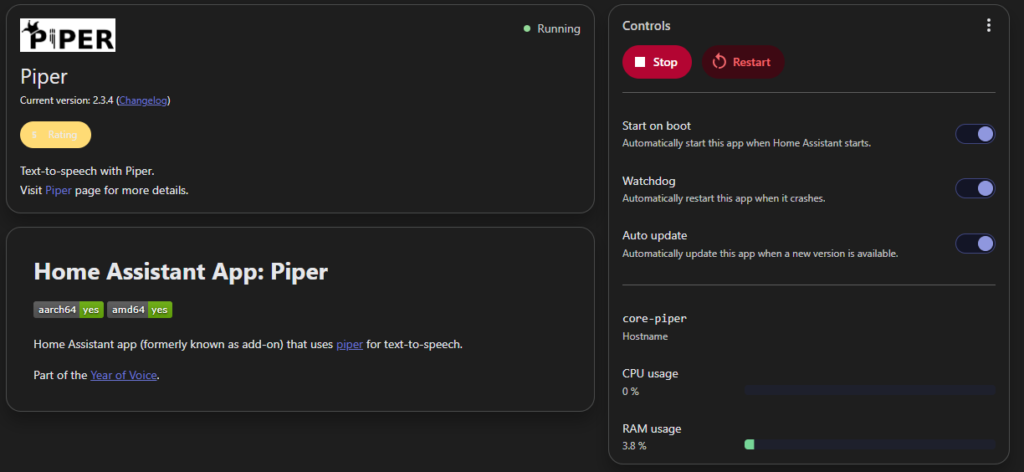
It’ll usually show up under Discovered. If not, click Add Integration and search for it manually.
If it asks for a Hostname and Port:
- You can check the Hostname in the add on’s own info tab.
- Piper Port: 10200
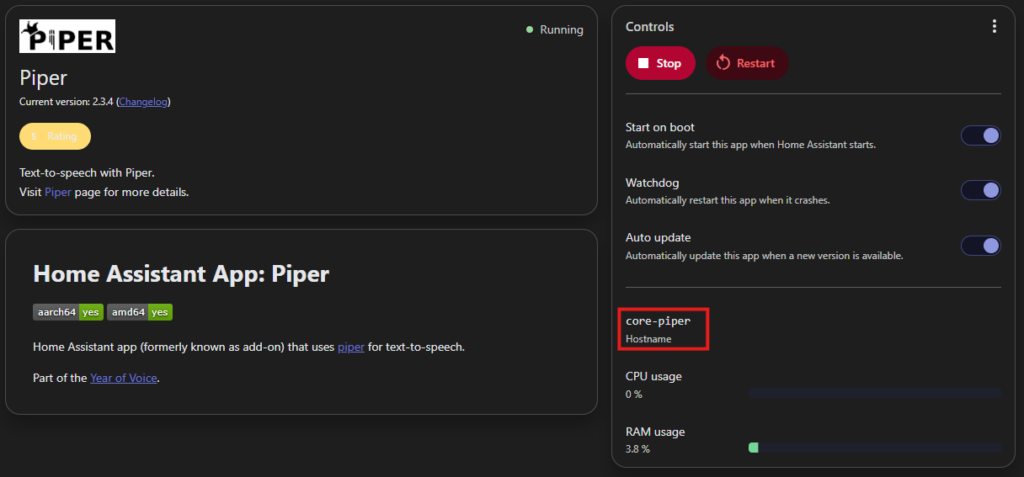
As a recommendation, once you install Piper, go to Settings → Application and open its Configuration view. There you’ll be able to select the voice in whatever language you want.
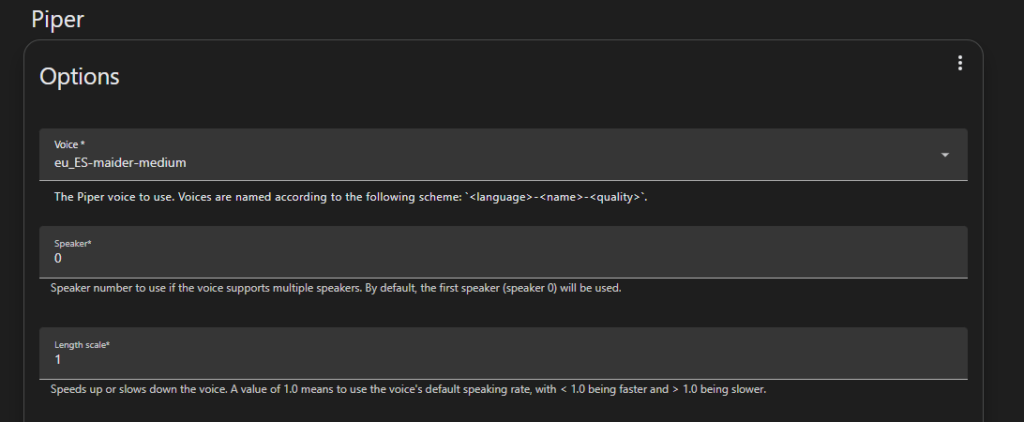
Setting up the Voice Assistant
After that, go to Settings → Voice Assistants and add a new one where you can configure the Speech to Text and Text to Speech engines.
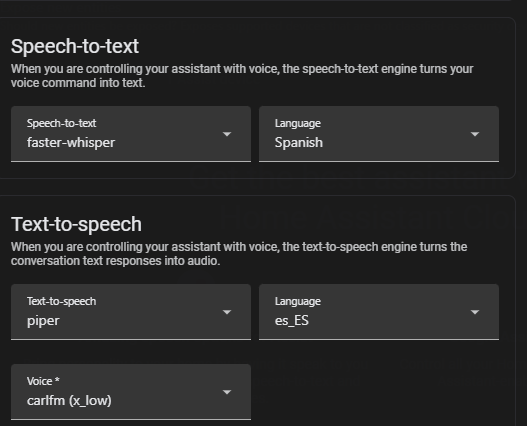
Setting up Home Assistant scripts and automations
For scripts and automations, you’ll need to add the YAML files found in the repository, under the /script and /automatization folders respectively.
Go to Settings → Automations & Scenes. For the automation (or the script), create a new one from scratch. Click the three dots in the top right corner and select Edit in YAML. Paste the corresponding code and save the changes.
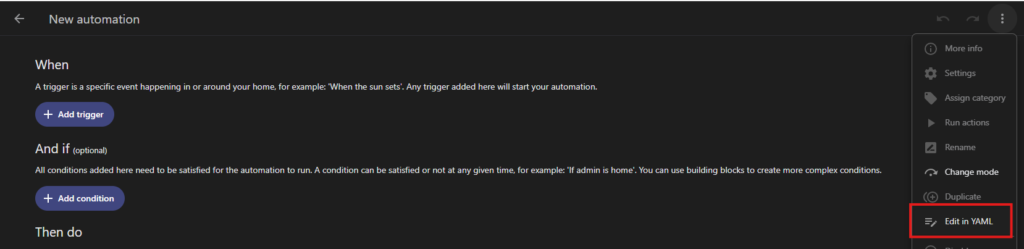
How to use the voice shopping list
Once the whole system is set up, we can now use the reTerminal D1001 as a standalone shopping list connected directly to Home Assistant.
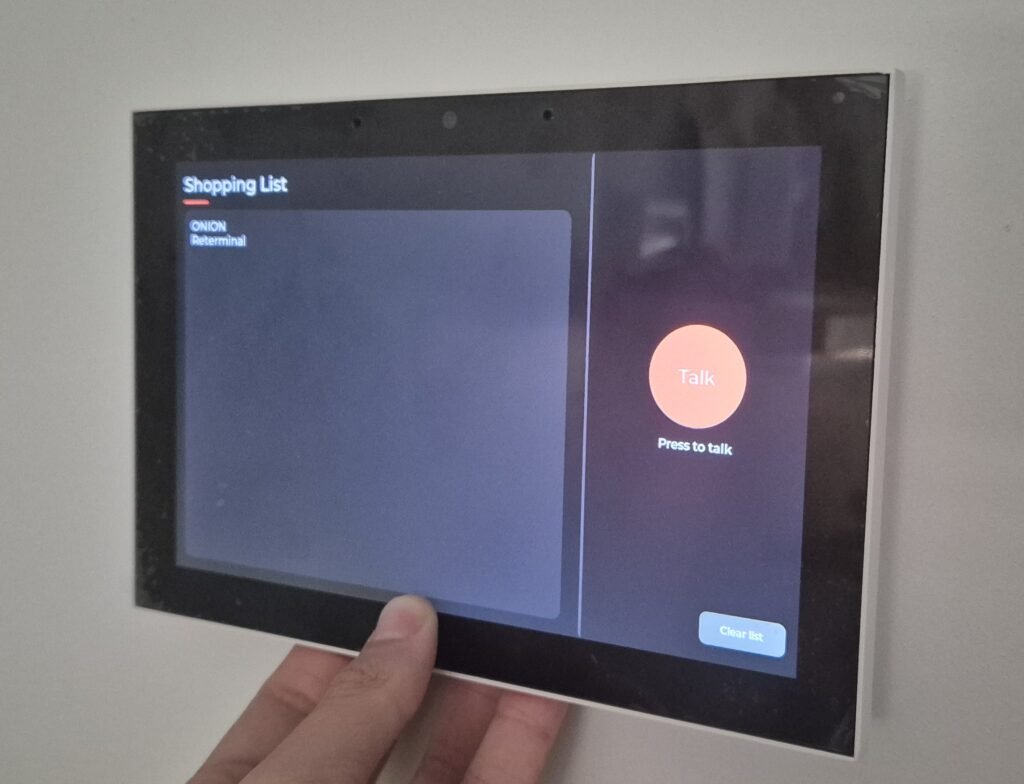
To add a product, all we have to do is press the voice assistant button and say, for example:
“Add milk to the shopping list”
The reTerminal sends the audio to Home Assistant, where Whisper converts our voice into text. Home Assistant interprets the command and automatically adds the product to the todo.shopping_list entity.
We can repeat this process as many times as we want:
“Add eggs to the shopping list”
Every product gets added directly to the Home Assistant shopping list, so we can also check it later from our smartphone or from any other interface connected to Home Assistant.
We can also use the second button on the reTerminal to clear the shopping list. Pressing it runs the script we configured earlier, and every item in todo.shopping_list gets deleted.
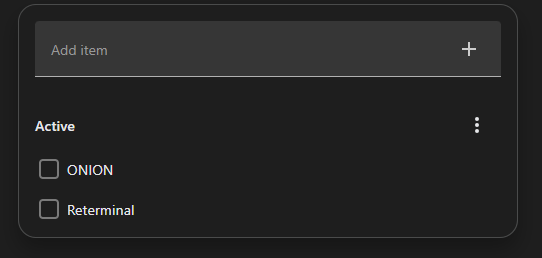
Troubleshooting
Issues clearing items from the shopping list.
In settings, I got this message.
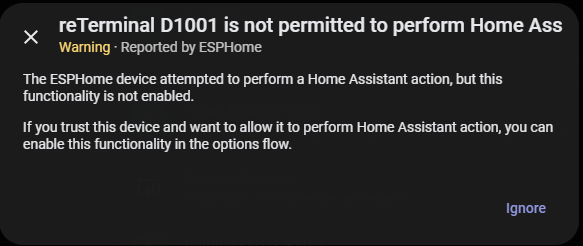
To fix it, go to Settings → Applications and look for ESPHome.
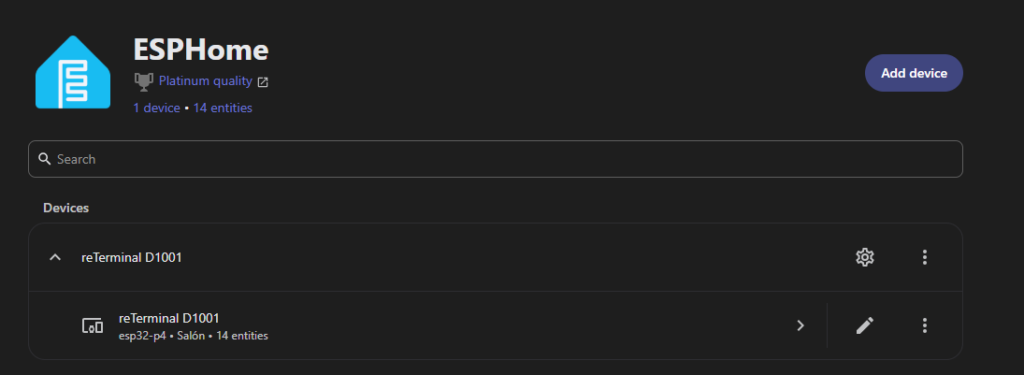
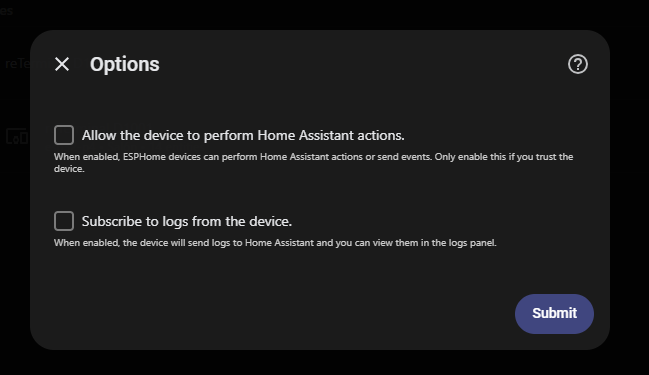
Click the settings icon for our reTerminal D1001 and allow it to perform actions on Home Assistant.
Conclusions
If you want a fast, custom built physical control center for Home Assistant, the reTerminal D1001 is well worth it. That said, keep in mind it requires some upfront configuration work to get it exactly how you want it, but the end result is a voice shopping list that just works on its own, no Alexa involved.
I’ll keep adding more features to the terminal! Subscribe to the newsletter if you want to stay up to date with the updates.
I’d like to give a big thanks for this work to “fsuk” and “alva“, two main contributors to the Home Assistant community, since this thread was a huge help in building it.
https://community.home-assistant.io/t/home-assistant-with-seeed-d1001/1007802/15