
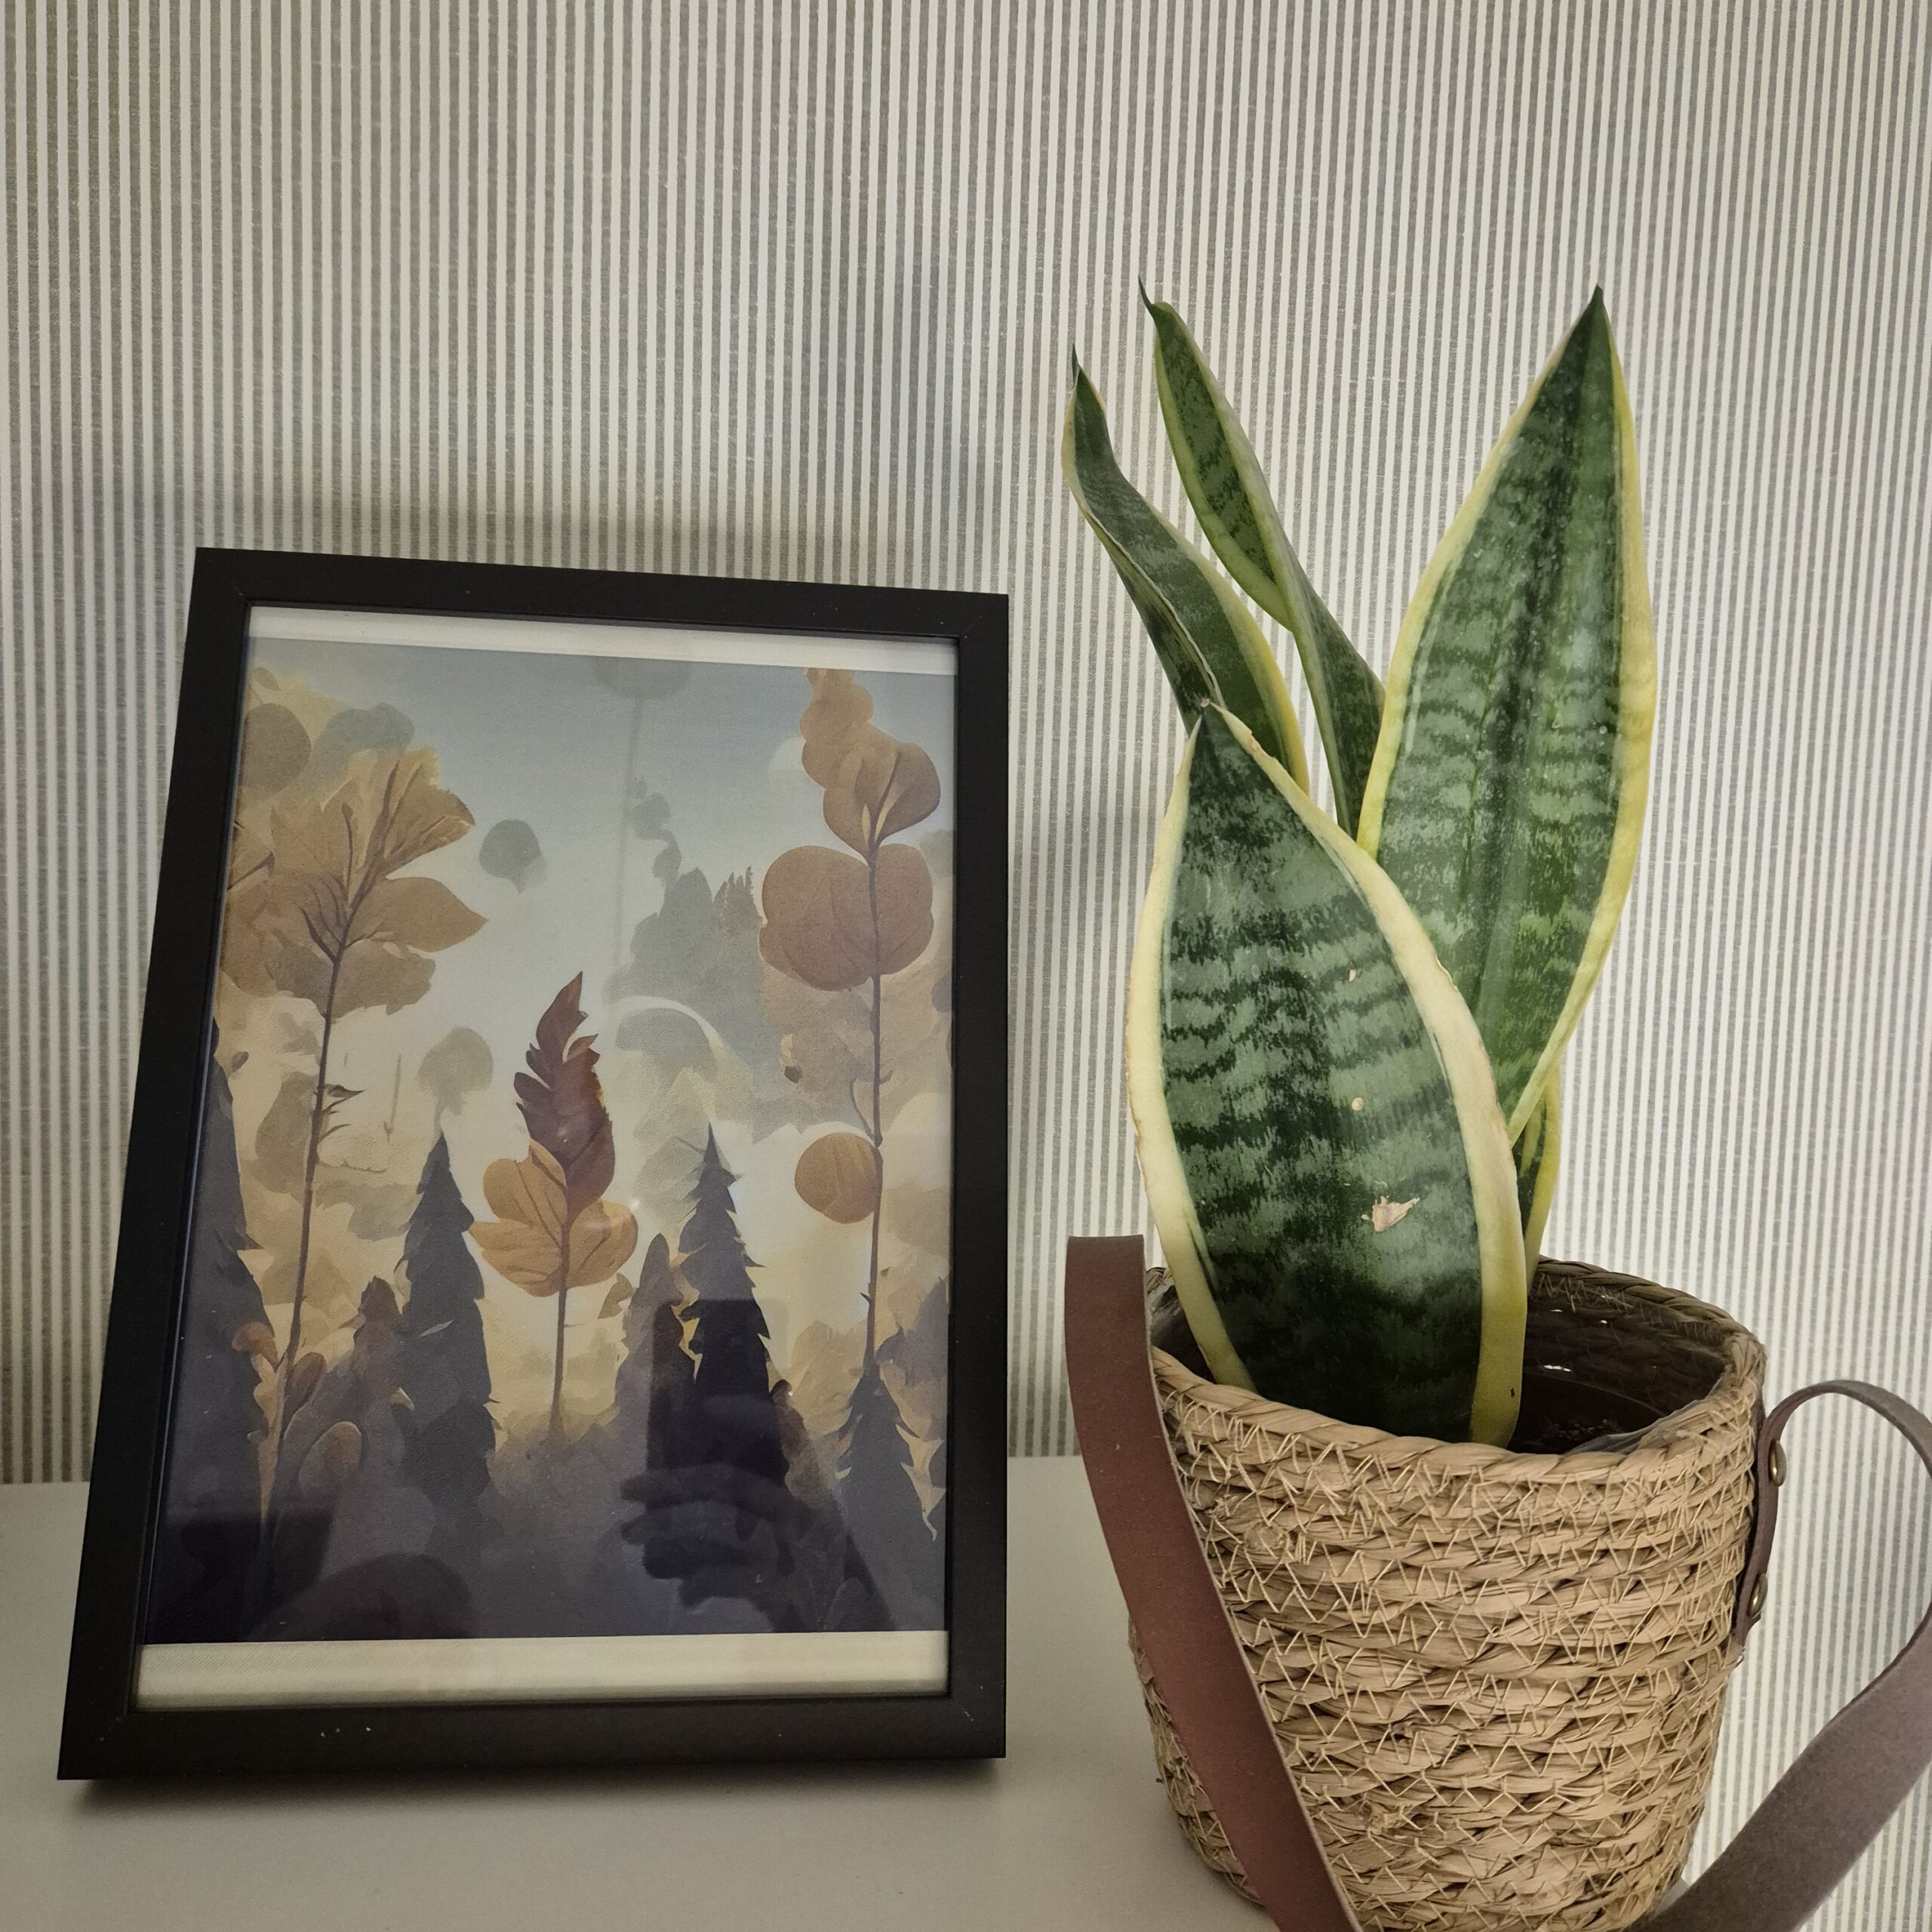
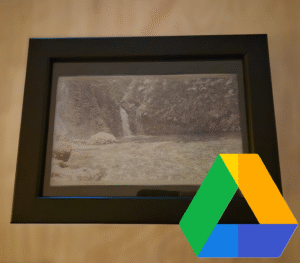
Digital e-paper frames have become very popular lately. They are the perfect addition to any desk or living room, but when I looked into buying one, the prices seemed completely out of orbit. We’re talking about extremely high prices for what they actually offer. I preferred to find a way to build my own: customizable and, above all, much more affordable and, why not, based on an IKEA frame that costs just a few euros.
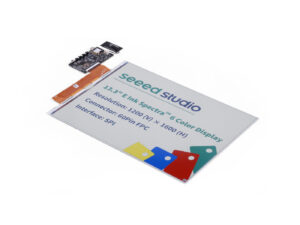
I found the 13.3-inch Spectra displays with support for up to 6 colors. While researching suppliers, I came across the XIAO ePaper DIY (EE02) kit from Seeed Studio. What’s interesting about this kit is that, besides the panel, it includes a controller board with everything you need to get it running from minute one, and, honestly, it’s the most affordable option I’ve found for a 13.3″ Spectra.
Additionally, Seeed provides firmware that, combined with their SenseCraft online tool, allows you to manage what is displayed on the screen directly from the cloud. It’s a very convenient solution if you don’t want to mess around with code right from the start.
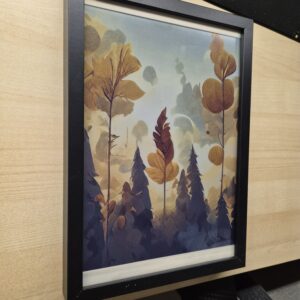
Table of Contents
ToggleHardware
The controller board is based on the XIAO ePaper DIY (EE02) kit, which gives us everything ready to go out of the box. This board is specifically designed to handle large-format e-paper displays, featuring the necessary level-shifting circuits and power management to drive the 13.3″ Spectra panel efficiently
For the power supply, I opted for a 103450 3.7V 2000mAh LiPo battery with a PH2 connector. It is thin enough to remain hidden behind the frame and offers decent battery life, considering that e-ink only consumes power during the refresh process.
Link: 3.7V 2000mAh Battery
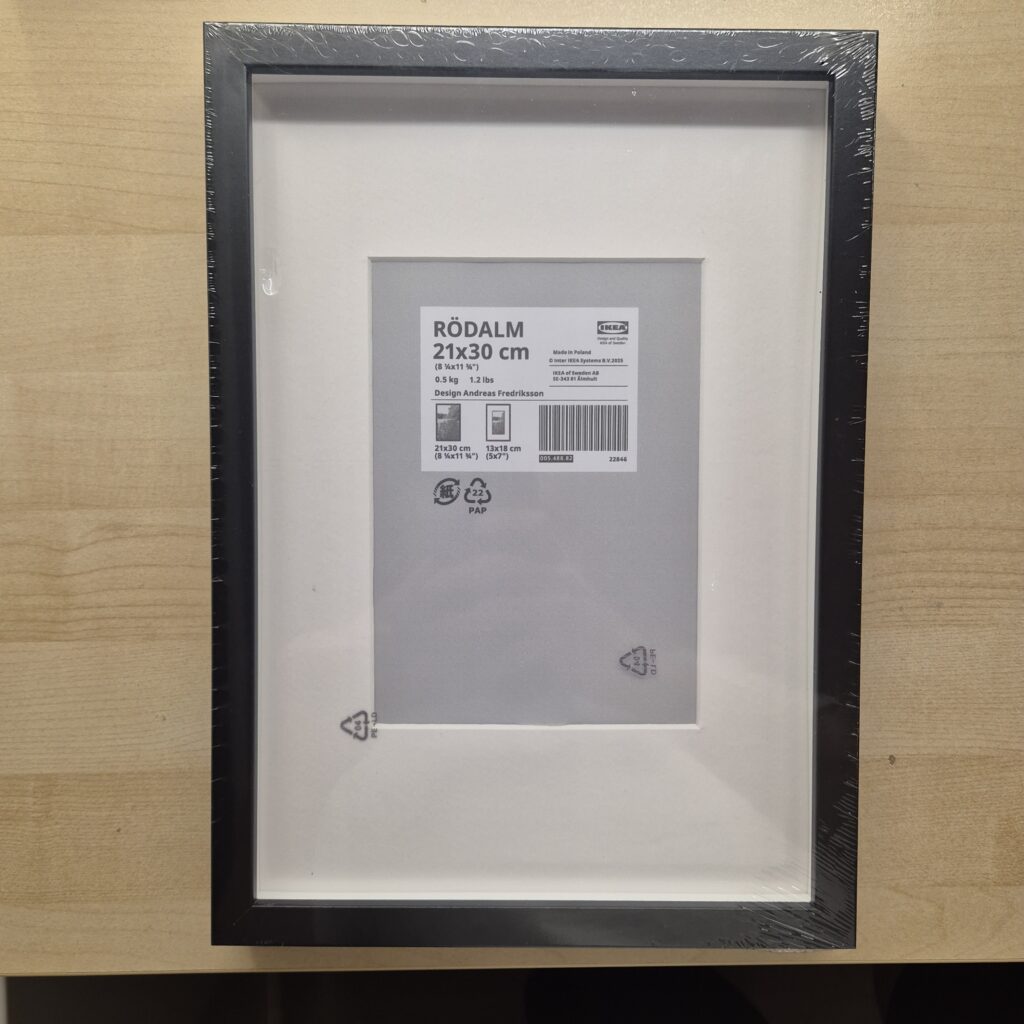
The Frame: IKEA RODALM Hack
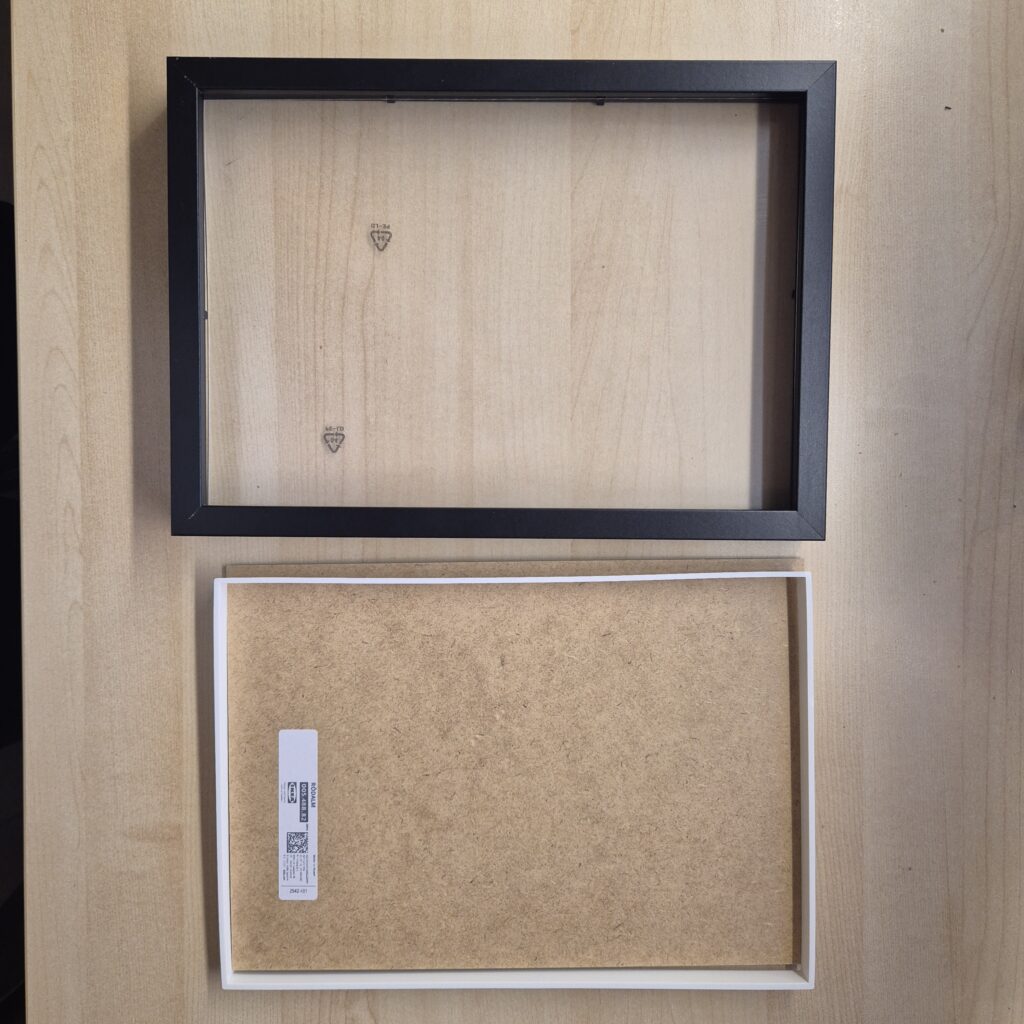
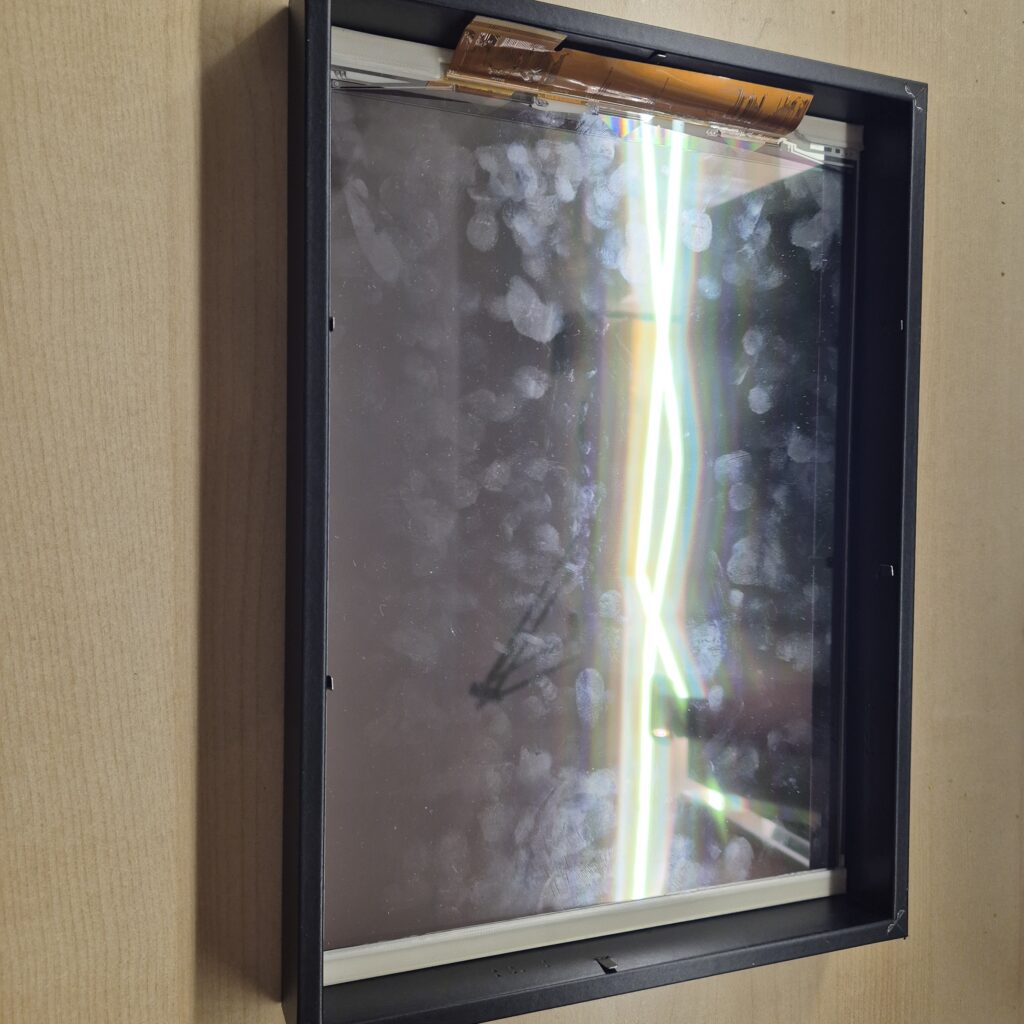
For the frame, I found the IKEA RODALM (21x30cm), which was the best fit for my display’s dimensions. However, it wasn’t perfect, and I ran into several issues when mounting the display:
Width: The 21cm fit is almost perfect.
Height: The 30cm frame is too tall for the display, leaving gaps where you could even see the flat cable (FPC).
The simplest option would have been to trim the included foam, but I preferred to create several 3D-printed parts to solve this problem more elegantly.
3D Printed Parts
The main idea is to prevent components from dangling loose inside the frame. By screwing or snapping them into the wooden back panel, we ensure no unnecessary pressure is applied to the e-ink panel, which, as you know, is extremely fragile under mechanical stress.
Link: [DOWNLOAD 3D Parts Free]
I designed four specific parts for the assembly:
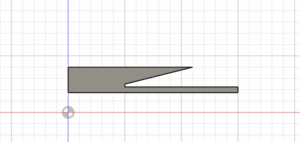
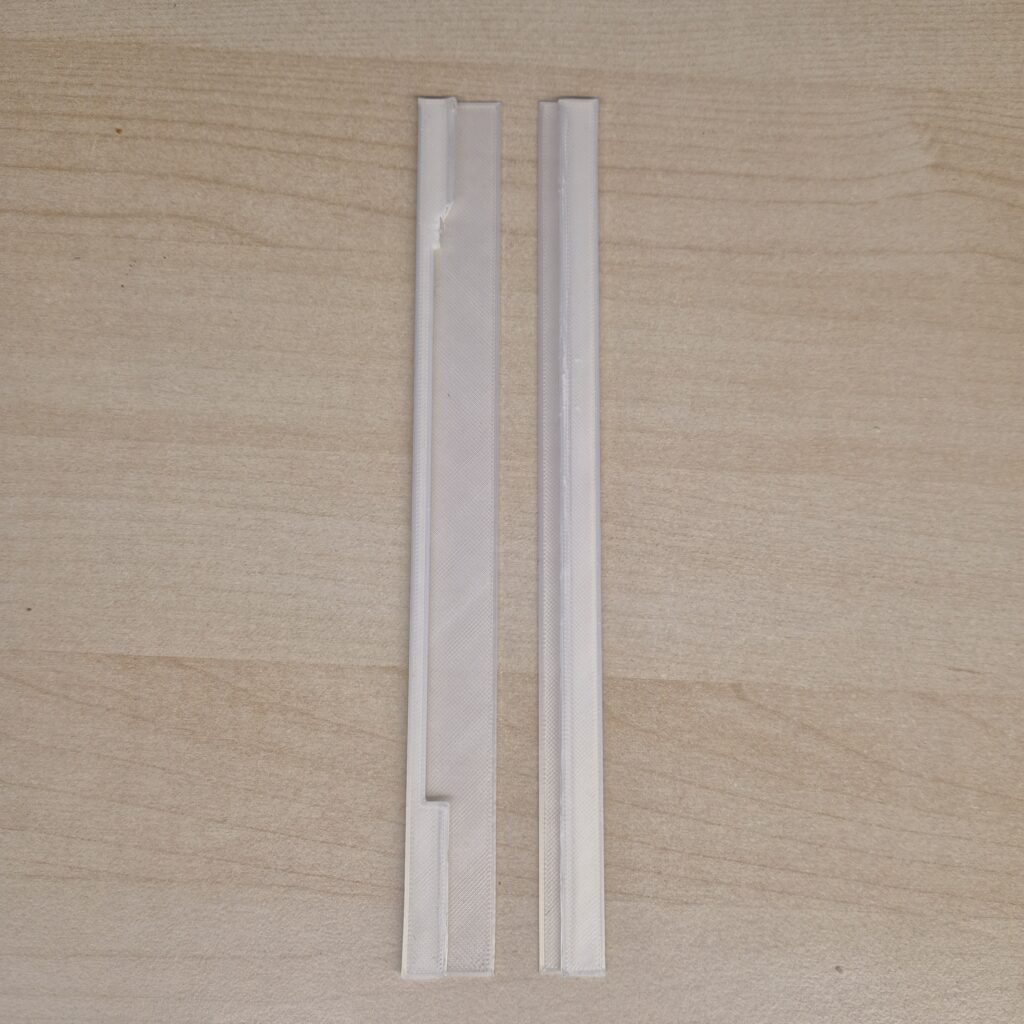
Standard Edge Spacer: This side piece compensates for the extra space in the IKEA frame, keeping the display centered and snug. If you look at the cross-section, it isn’t just a flat strip; it has a beveled profile. This is critical to “hug” the e-ink panel and ensure it stays perfectly flat against the glass without overstressing it.
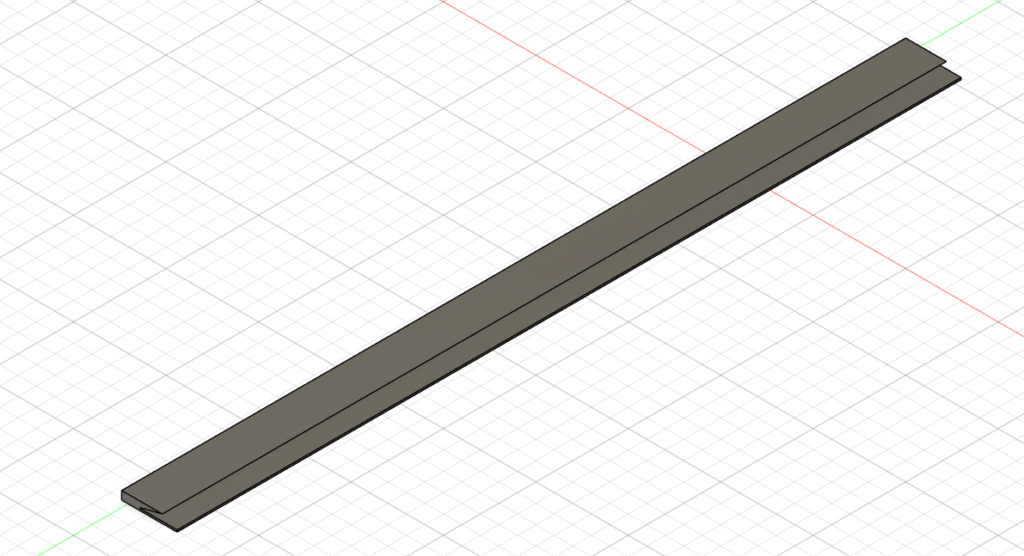
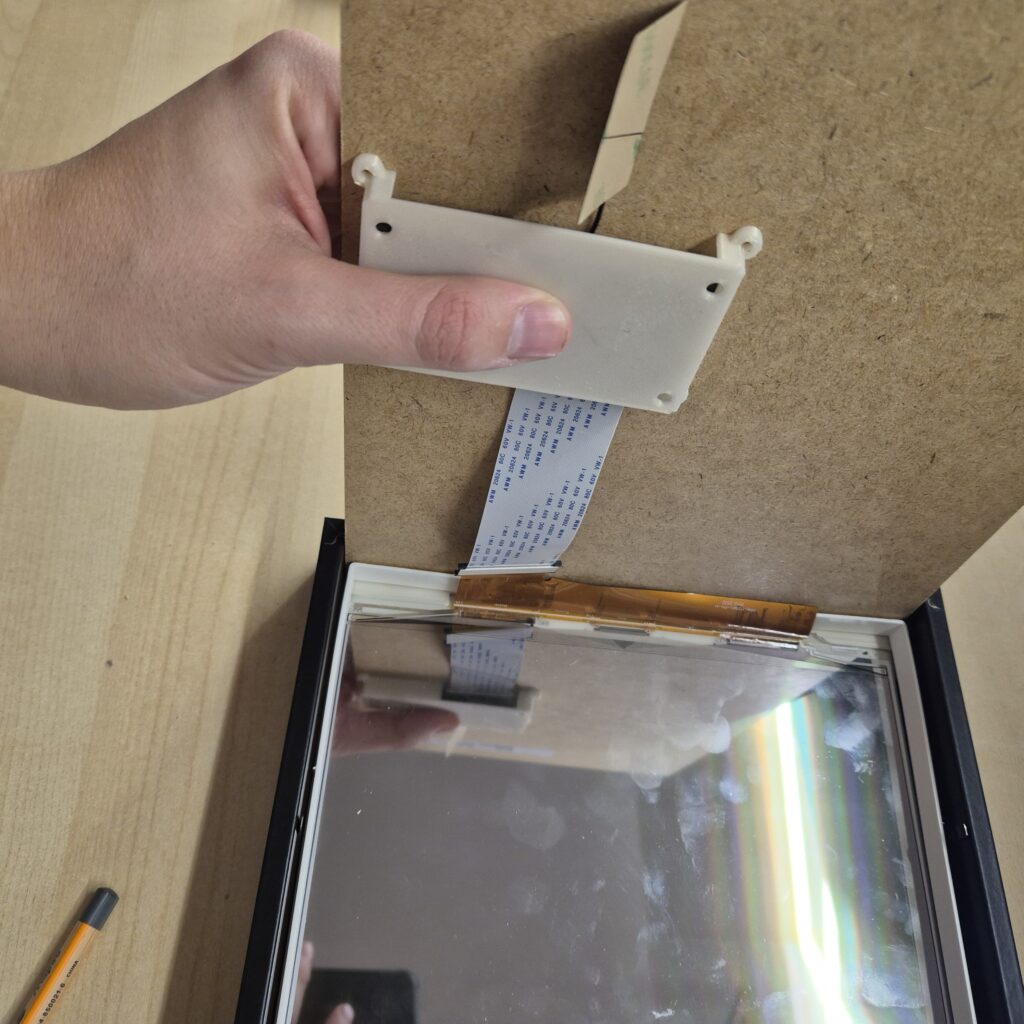
FPC Cable Spacer: Similar to the standard spacer but with a dedicated notched recessed area. This allows the wide 13.3″ FPC cable to pass through from the front of the display to the back of the frame without being pinched or crushed by the mounting pressure.
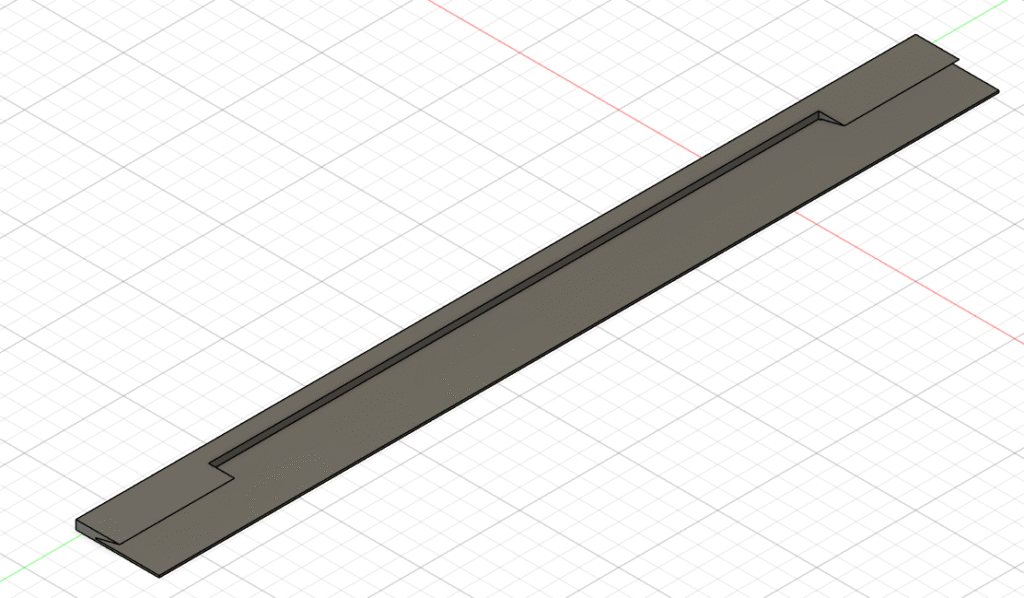
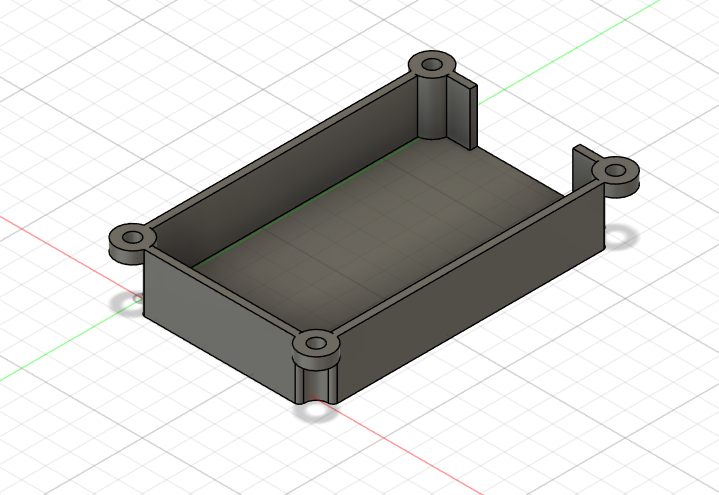
Controller Case: A small housing to protect the EE02 kit board. I included openings for the 13.3″ display’s wide FPC cable, the USB port, the buttons, and the battery connector.
Improve: You might consider using a USB adapter cable like this one so you don’t have to open the frame to charge the battery. I haven’t included it in this guide yet as mine hasn’t arrived.
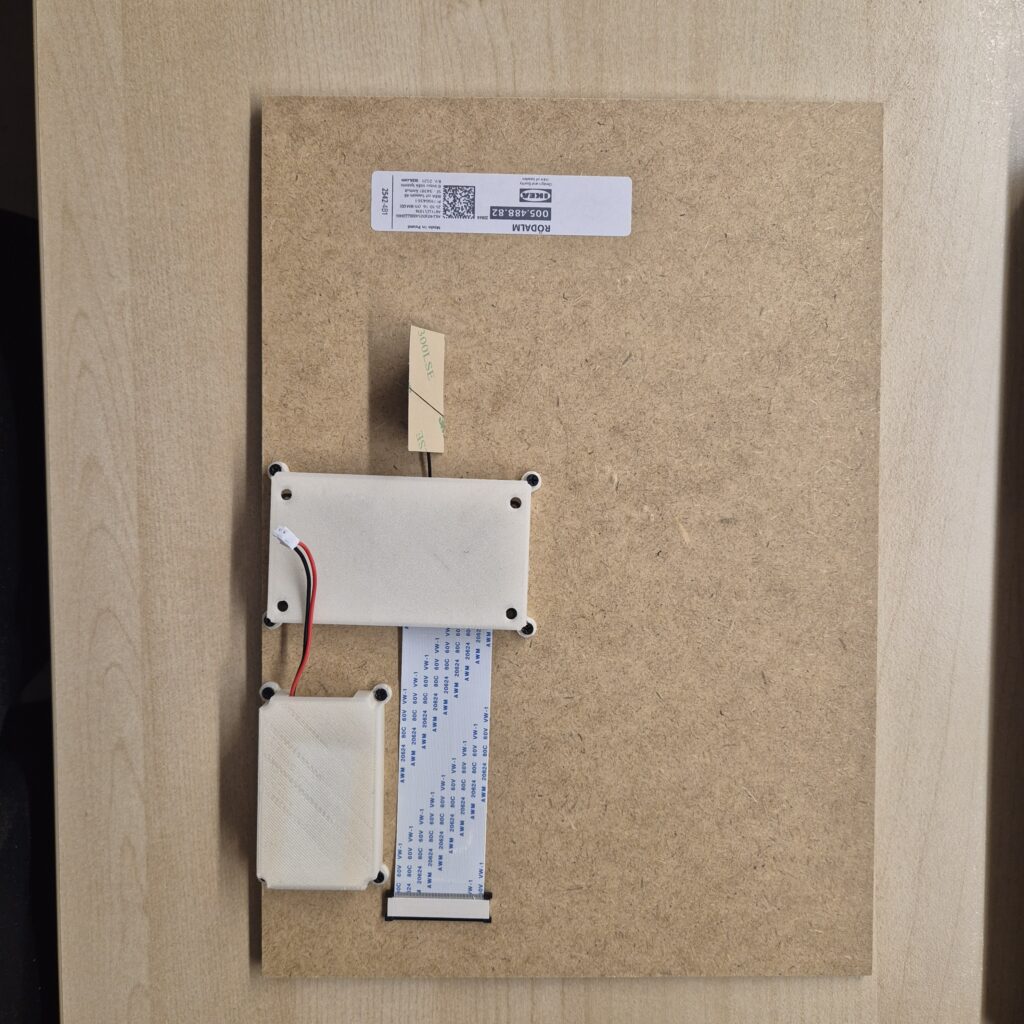
Battery Case: Another piece to house the 2000mAh cell. It has a bit of extra margin in case you use a battery with slightly larger dimensions.
Assembly Process
Thanks to the 3D-printed design, the assembly is very clean. Here are the steps I followed:
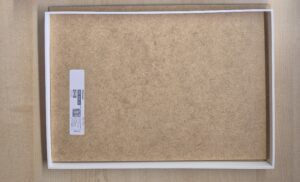
Frame Preparation: Disassemble the IKEA RODALM and clean the glass thoroughly. Take the 3D-printed side spacers.
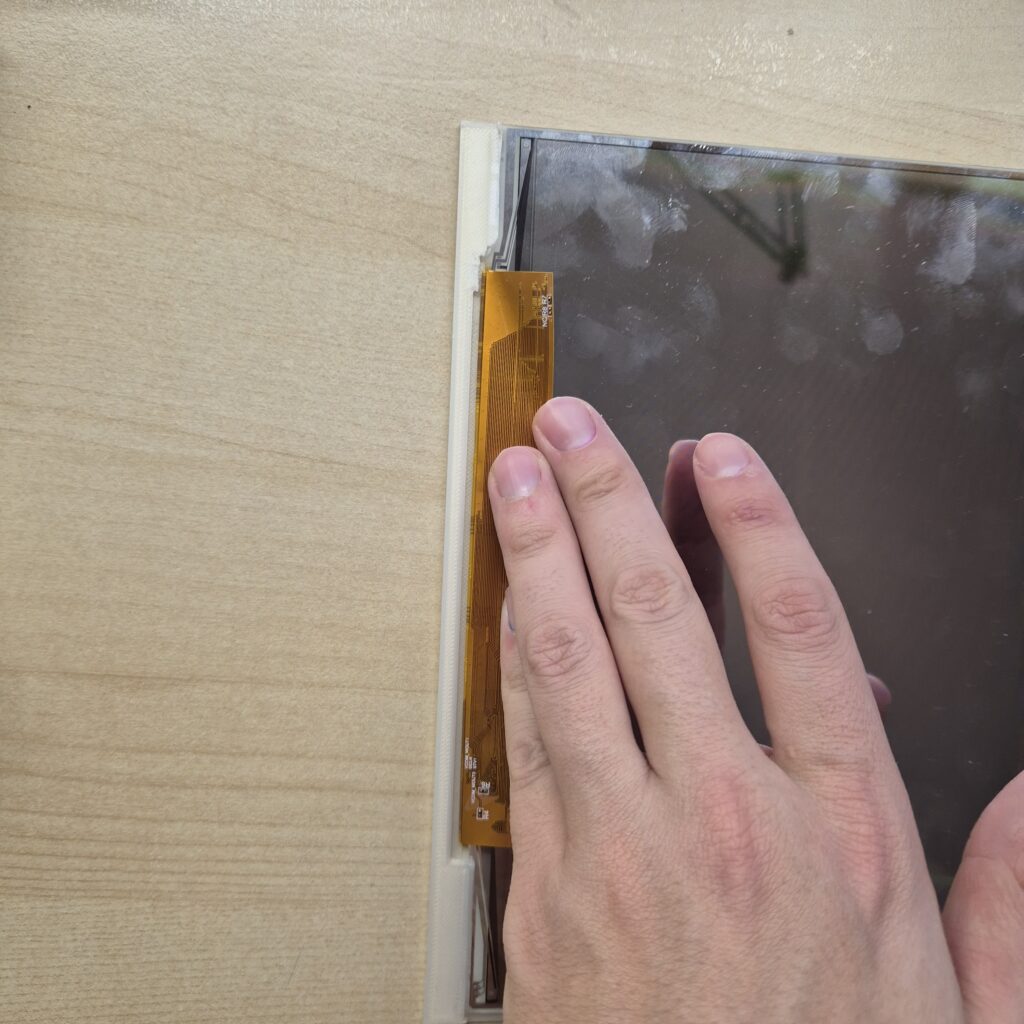
Display Positioning: First, place the FPC Cable Spacer on the side where the cable will exit. Then, insert the 13.3″ Spectra panel into the frame at an angle, making sure the FPC cable sits comfortably in its notched area.
Once the display is leaning inside the frame, put the other spacer into the opposite side. This ensures that as the panel drops into its final position, it is perfectly aligned and snug with no lateral play.
Installing the Electronics Support: Now, place the white rectangular plastic piece (included in the Ikea frame) directly over the back of the display. This piece acts as a protective layer and a mounting base. We will use this rectangle to insert and organize the electronics, ensuring everything stays in place before closing the frame.
Securing the Electronics: Prepare the wooden back panel (MDF). Before closing, screw the 3D-printed cases (Controller and Battery) to the wood. I used M2*8 screws for this.
- LINK: [Kit screws]
Even with the thin MDF board, the screws can often grip the wood well enough if tightened carefully with a screwdriver. However, if you want a more permanent or secure fit, you should consider using nuts on the other side. As seen in the photos, the positioning is key: ensure the FPC cable exits naturally toward the board connector without any aggressive bends that could damage it.
Final Connection: Connect the FPC and the battery. Close the frame, ensuring the metal tabs of the IKEA RODALM firmly hold the “sandwich” of wood, 3D parts, and display.

Setup and SenseCraft
For content management, Seeed provides firmware that works with their SenseCraft online tool. I’m not going to waste time explaining the step-by-step configuration of the board or the platform because the Official Seeed Studio Wiki has it perfectly documented:
I recommend following their guide for the initial setup. Since it’s the official wiki, they will keep it updated if the tool or firmware changes. Once you have the board “alive,” come back here for the actual physical assembly.
Conclusion
For a fraction of the cost of a commercial frame, I have a 13.3″ panel with Spectra colors that looks incredible. This project proves that you don’t need to spend a fortune on high-end tech; by going the DIY route, you can build a high-quality device that is both significantly more affordable and straightforward to assemble. The combination of IKEA + 3D Printing + XIAO is, once again, the winning formula for simple, budget-friendly smart home projects.
I’d also like to give a special thanks to eynoxart for the amazing artwork I used for the display demo.
If you enjoyed this project and want to support me in developing more open-source hardware hacks like this, you’ll find the “Buy Me a Coffee” button at the bottom of the page. Any contribution is greatly appreciated!

Did you mean to link to: XIAO ePaper DIY (EE02) kit from Seeed Studio
Sorry: https://www.seeedstudio.com/XIAO-ePaper-DIY-Kit-EE02-for-13-3-Spectratm-6-E-Ink.html?srsltid=AfmBOoqhP2dR2_VPcYylXnpbK29vTbCvZr_AlxYDCgz7FdAdbkDmulNk
Pingback: Serverless e-Ink Photo Frame: Using Google Drive for unlimited storage