
I’d seen a lot of conflicting info on various forums about the Arduino Uno Q’s boot time. I decided to stop guessing and test it myself using my own setup to see exactly how long it takes from power-on until the first instruction of a sketch actually executes.
In this article, I analyze the startup performance of the Arduino Uno Q boot. I’ll be measuring exactly how long it takes for the MCU sketch and the MPU Python script to execute from the moment the board receives power.
Unlike theoretical analyses, I am using external signals and a logic analyzer to pinpoint when each processor begins execution and determine whether they start simultaneously.
Specifically, I aim to answer: Does the MCU sketch start automatically? How long does the MPU take to run a configured Python script? Do both processors start at the same time?
If you haven’t seen the previous entries in the Arduino Uno Q series, I highly recommend reading [Arduino Uno Q. New Paradigm] and [Arduino Uno Q. Deep dive RPC], where I cover some core concepts that I’ll be referencing here.
Table of Contents
ToggleWhat is the current Arduino Uno Q boot time?
Execution Time: Sketch vs. Script
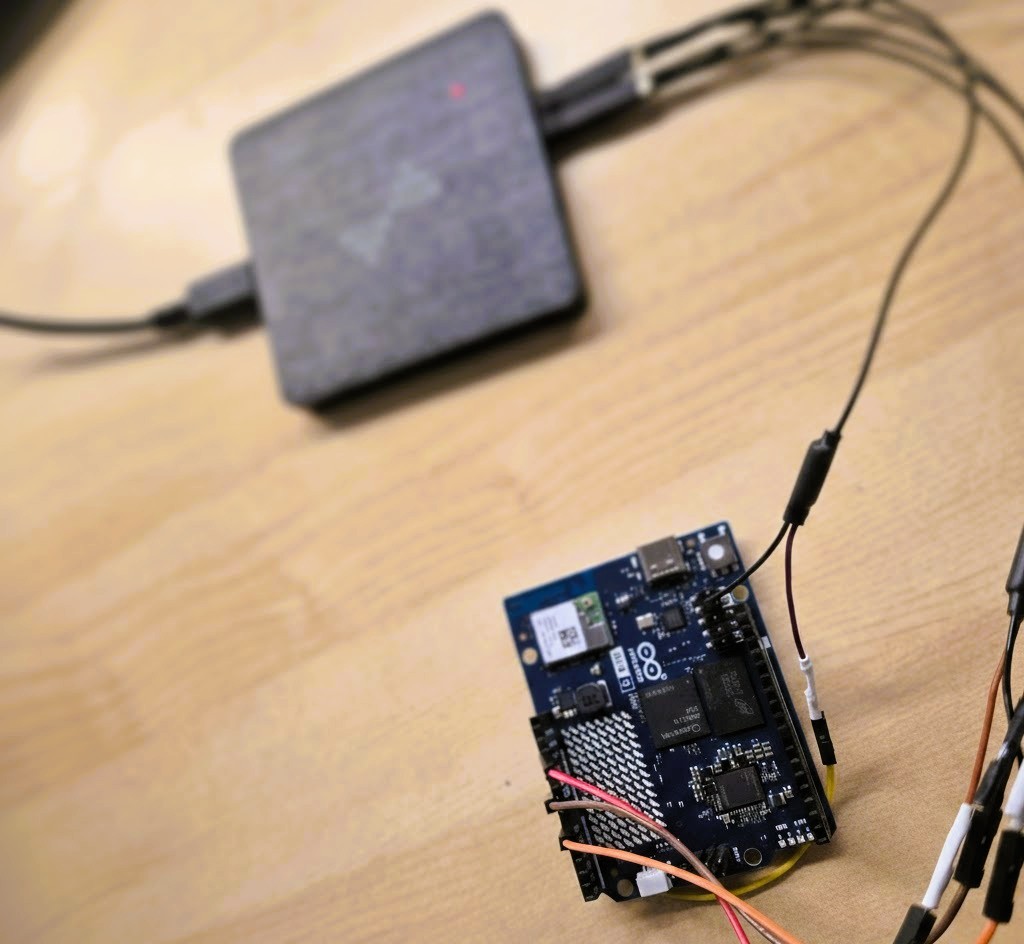
To achieve a real-world measurement, I developed the simplest possible programs to minimize additional latency. The goal was to ensure that the very first action taken by both the Python script (MPU) and the Arduino sketch (MCU) was externally measurable.
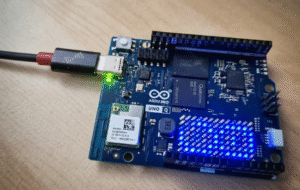
The most straightforward method was toggling a GPIO. This allowed me to use my logic analyzer (DSLogic U2Pro16) to capture the exact time difference from the moment the board receives power.
To establish a “Time Zero” reference, I connected the analyzer to the 3V3 (out) power rail to detect exactly when the board stabilizes after being plugged in.
The Test Code
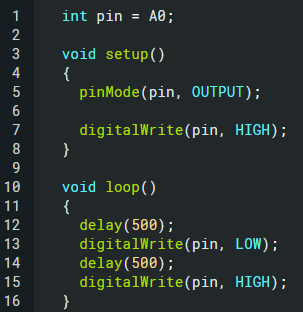
Arduino Sketch (MCU): Configures pin A0 (available on the header) as a digital output and performs a toggle with a 500ms period.
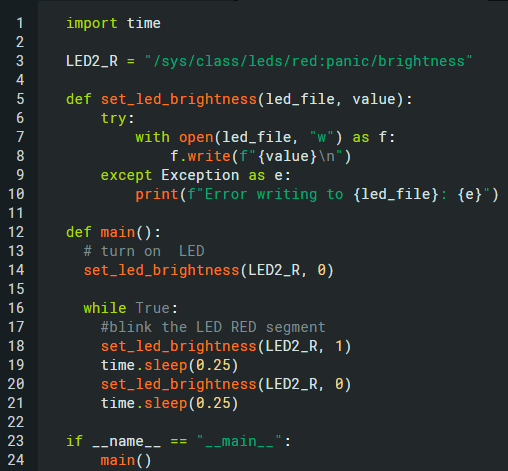
Python Script (MPU): This script handles the RGB LED,specifically the Red channel,toggling it on and off, in an interval of 250ms.
Technical Note: I initially attempted to use a standard GPIO, but it proved impossible to perform a
SETduring the Python startup phase. Furthermore, this pin is easily accessible from the outside by making contact with its corresponding pin on the RGB LED.
- Therefore, I utilized the Linux Sysfs native interface (
/sys/class) as the most reliable method for this test.
Configuration
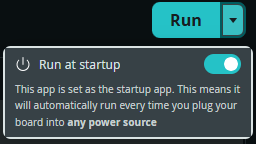
In addition to writing the code, you must configure the applications to launch automatically via Arduino App Lab. This is done through the “Run” menu by selecting the “Run at startup” option.
Benchmark Results
The measurements obtained were as follows:
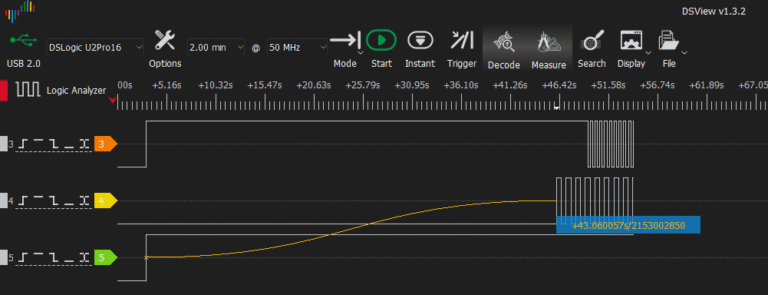
MCU Boot Time: 43.06 seconds.
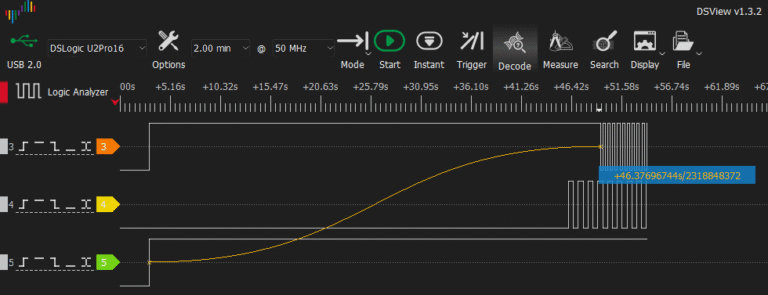
MPU Boot Time: 46.37 seconds.
- Delta: Approximately 3.27 seconds.
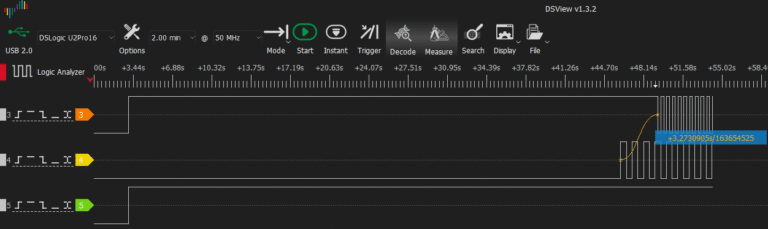
Looking at the delta, you might think the processors are independent, but the reality is that they run at the same boot time. The MCU only ‘wins’ by 3.3 seconds because it’s running bare-metal code, whereas the MPU has to fight through the final layers of Linux to finally reach the /sys/class interface and toggle the LED.
(Note: In the captured data, the first state change is an ‘OFF’ signal because the logic is inverted; what matters is the first state transition).
It is important to highlight that the MCU startup is not instantaneous. During the boot process, the board displays a pre-defined LED matrix sequence. This suggests that the sketch is either stored in a specific flash memory section or, alternatively, is re-flashed from the MPU to the MCU at every boot. While I haven’t verified the exact mechanism yet, these are the two most likely scenarios.
Final Verdict: Out of the box, the Arduino Uno Q boot time is quite slow. While there is likely room for optimization through deeper configuration tweaks, these are the baseline results for a standard setup.
GUI Boot Time Analysis
To better understand the MPU boot sequence, I ran systemd-analyze on the Arduino Uno Q. This tool breaks down the startup process into distinct stages and provides a comprehensive total time. In my case, the output was:

These results indicate that the total Linux boot time: from power-on to a fully initialized userspace, is approximately 28.84 seconds.
Breakdown of the Boot Stages:
| Boot Stage | Description | Time |
|---|---|---|
| Firmware & Bootloader | Hardware initialization and U-Boot preparing the system | ~7.5s |
| Kernel | Kernel loads drivers, mounts filesystem, and initializes core services | ~5.8s |
| Userspace | Systemd starts services and prepares the full runtime environment | ~15.5s |
It is interesting to note a significant discrepancy: while the Linux OS is ready in roughly 29 seconds, our Python application takes an additional ~17 seconds to actually begin execution (as seen in our previous 46.3s measurement).
This delay is likely caused by the overhead of the container runtime or the specific Arduino App Lab framework responsible for launching user applications once the operating system is fully up and running.
MPU Activity During Boot
To understand the reasons behind the long startup time, I decided to investigate exactly what the MPU is doing during the boot sequence.
According to the Arduino Uno Q User Manual, the board features a Hardware Debug UART interface. To verify if there was any activity during power-up, I connected my logic analyzer to the TX line and confirmed data transmission at 115200 baud. Since analyzing large amounts of data this way isn’t practical, I switched to a USB-to-TTL converter.
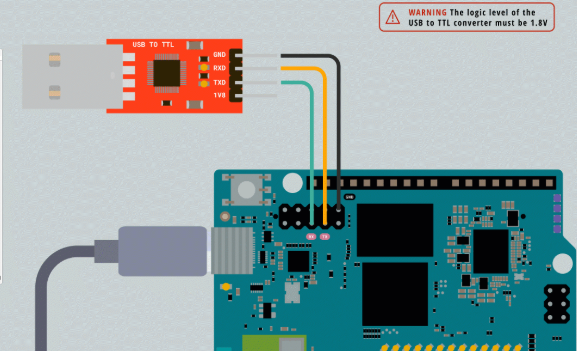
Warning: Be extremely careful with voltage levels. The Arduino Uno Q uses 1.8V logic. Most USB-TTL converters only support 3.3V or 5V.
Aliexpress TTL Converter: 1V8, 3V3 & 5V: https://s.click.aliexpress.com/e/_c3Fy2qzp
I captured the boot logs using HTerm, a highly recommended tool for serial debugging. Here is a breakdown of the most relevant events:
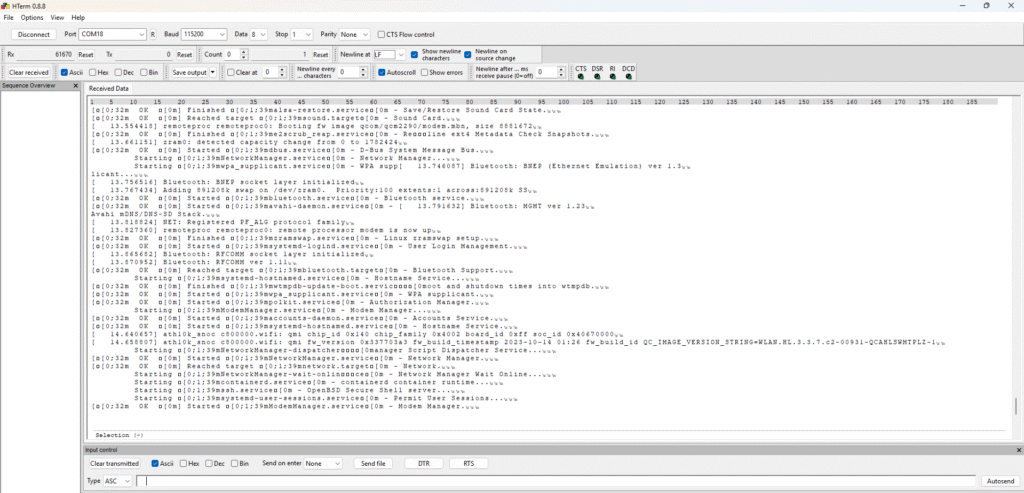
The Boot Sequence Breakdown
U-Boot Loader: The first stage is a bootloader phase based on U-Boot, identified by the following trace:
U-Boot 2025.07It utilizes a specific Device Tree for the “Imola” board. This process can be interrupted to access configuration options—something I’ll explore in a future post. Following this, EFI handles the Linux Kernel decompression and loads the temporary filesystem (initramfs).Kernel Handoff: Once U-Boot finishes, the Linux kernel and its specific device tree are loaded. EFI services are released, and the kernel takes full control.
Linux version 6.16.7Machine model: Arduino SA, ImolaKASLR enabledKernel: Linux 6.16.7, specifically compiled for this board.
Security: KASLR (Kernel Address Space Layout Randomization) is enabled.
Architecture: ARM64 (AArch64).
Multicore Activation: The remaining processor cores are initialized.
Service Initialization: Peripheral systems are brought online, including Graphics, Console, Audio, and Networking.
Application Launch: Finally (though not shown in these specific traces), user applications are loaded and executed.
Conclusion
Following these tests, it is clear that in dual-architecture systems like the Arduino Uno Q, the responsiveness isn’t exactly what you would expect from a conventional microcontroller.
While the MCU is inherently fast and ideal for time-critical tasks, its startup is entirely dependent on the operating system’s boot sequence. If Linux fails to boot and the firmware is faulty, the MCU will not run our test until those 43 seconds have passed.
Furthermore, the significant gap between the 29 seconds it takes for the system to be ready and the 46 seconds it takes for our application to run serves as a reminder: the managed environment of Arduino App Lab adds a layer of latency that must be considered if your project requires absolute immediacy.
The Arduino Uno Q offers massive processing power, but understanding these timing constraints is key to successful implementation.
What’s next? Depending on the interest this post generates, I may explore ways to optimize U-Boot or disable non-essential Debian services to decrease some startup time. However, that’s a topic for another entry.
Let me know what you think in the comments, or tell me what else you’d like to see in future posts of this series!
Thank you very much for your thorough investigation and analysis. This makes things much clearer!
Pingback: Community spotlight: MyEmbeddedStuff | Arduino Blog