Table of Contents
ToggleIntroduction
Deploying a reliable repeater node in a Meshcore network involves many aspects that need to be considered. What chip are we going to use and what consumption does it have, what type of batteries will power the equipment, how much will we size the solar panels that will charge the equipment, what will be the lifetime of the equipment. All these aspects are basic and very important, since a repeater should be located in the highest possible area to maximize its connectivity with other nodes and very likely it will have somewhat limited access. For example, if we deploy it on a roof, we won’t be climbing up every other day to fix problems.
Apart from these problems I mentioned, there is one that is key, and that is device updates. We’re seeing this project can have official updates roughly every 4 to 6 weeks. Some of them are aimed at fixing bugs and others provide us with new features to enhance the network further. Imagine how boring it would be to have to climb up to get the repeater and flash it with the new update every time Meshcore releases something.
That’s why the term OTA appears, which means “Over The Air” update, so we can update our device without having it physically. I’ll show you what OTA is, how it works, and the exact steps to update a Meshcore repeater using the SenseCap Solar Node P1-Pro.
I recommend before continuing that you check the previous posts where I describe how the Meshcore network works versus meshtastic or how to flash a device with meshcore firmware.
https://myembeddedstuff.com/meshcore-vs-meshtastic-seeed-studio
What is OTA for Meshcore Devices?
OTA (Over The Air) is a mechanism that allows you to update the firmware of your network devices without needing physical access to them. Instead of having to connect a USB cable and manually flash each repeater, the new firmware is transferred remotely via Bluetooth from your smartphone (which acts as a gateway/companion device).
This is especially critical in mesh repeaters because, as mentioned earlier, they are usually located in hard-to-reach places (roofs, towers, elevated posts). Without OTA, each firmware update would be a complicated and costly logistical task. With OTA, you simply get close to your smartphone, run the command from the Meshcore App, and the device updates automatically.
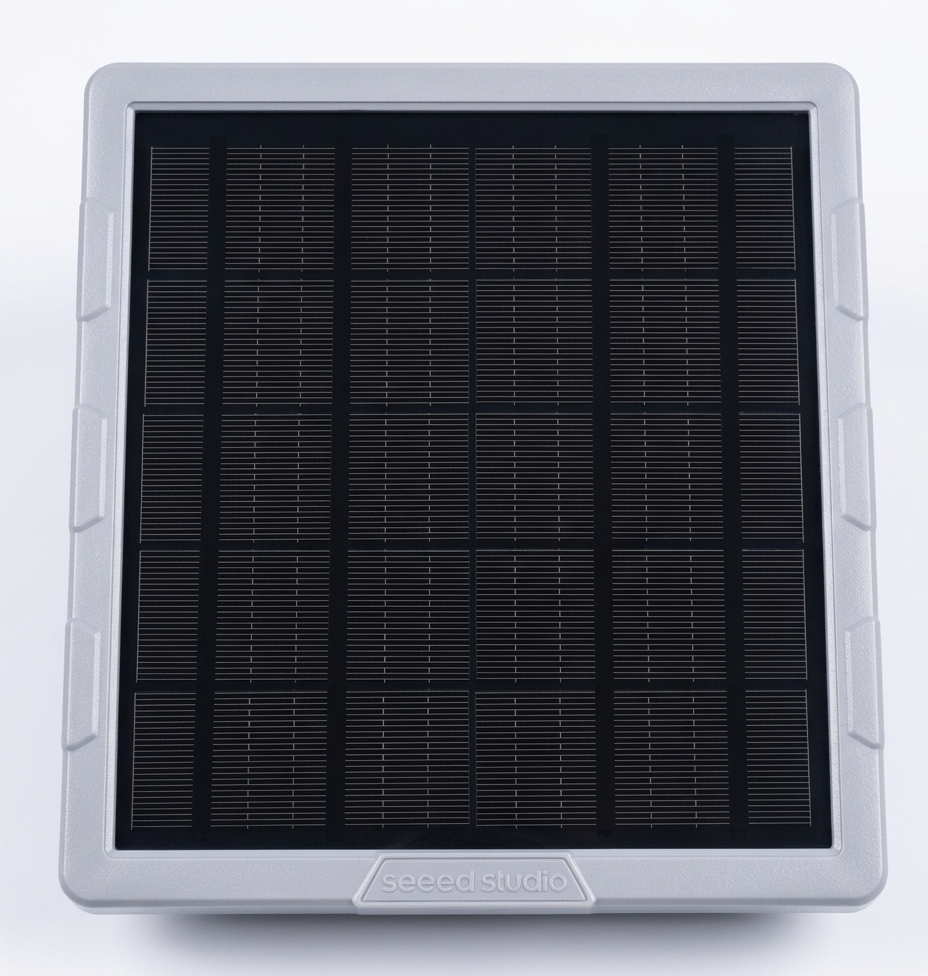
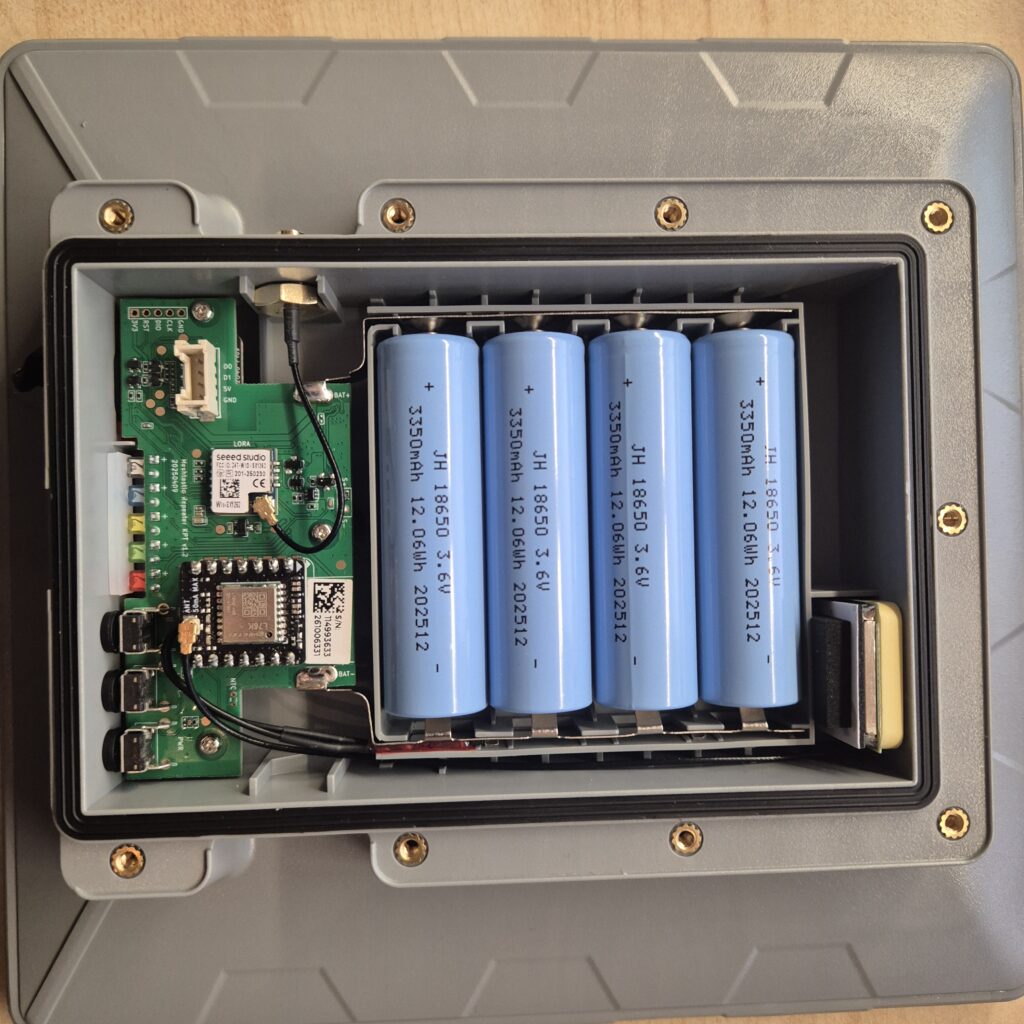
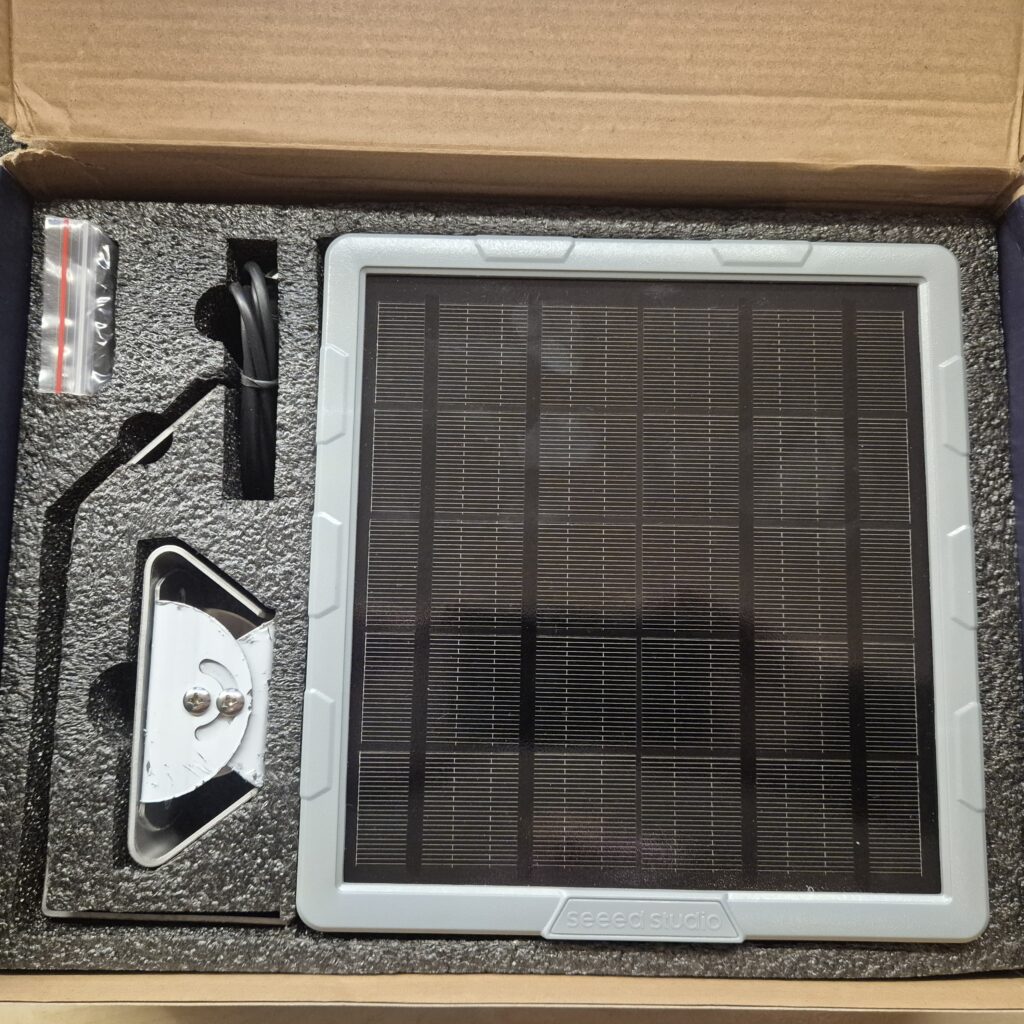
SenseCap Solar Node P1-Pro: Hardware Specifications
For this project, I am using the SenseCap Solar Node P1-Pro from SeeedStudio, which is a ready-to-use platform with nRF52840, integrated solar panel and rechargeable battery.
- MCU: nRF52840 (Cortex-M4, 64MHz)
- Power source: Solar panel + rechargeable battery (Li-Po)
- Size: Compact and rugged (IP67)
- Use cases: Ideal for outdoor mesh repeater nodes with long-term durability requirements
- Pre-compiled Meshcore firmware, very easy to flash. Can be adapted for Meshtastic.
From my point of view it’s the perfect device if what you want is to have a repeater (don’t consider it for a Companion, because although it could be used it doesn’t make much sense) perfect for outdoors because you forget about plugs: the solar panel keeps the device powered indefinitely.
How to Perform OTA Updates on Meshcore Repeaters
This process is divided into two distinct steps:
- First, the bootloader must have the OTA Fix patch. This is a one-time update required to enable the feature.
- Once that patch is in place, you will be able to flash any future firmware versions directly from the app.
Besides that you’ll need certain applications on your smartphone and a Companion device.
Prerequisites
Before we start the step-by-step process, you need to make sure you have a few essential tools ready.
- Meshcore APP
- Companion device
- nRF DeviceFirmwareUpdate DFU Smartphone Application. Android Link.
- Firmware to update downloaded on your smartphone. Download the .zip
- Repeater updated with OTA FIX
Step 1: OTA FIX Update (One-time Setup)
Depending on the version you have of your repeater, you may need to first perform a bootloader update (via USB cable) – a specific firmware responsible for updating the main firmware you want to run. This is needed to update the default bootloader, it has to be done only one time.
In the case of SeeedStudio SenseCap, you can follow the installation guide, but when you select that you want to run it in Repeater mode through their web interface.
Note: Remember to use the official website to perform te update: https://meshcore.io/flasher
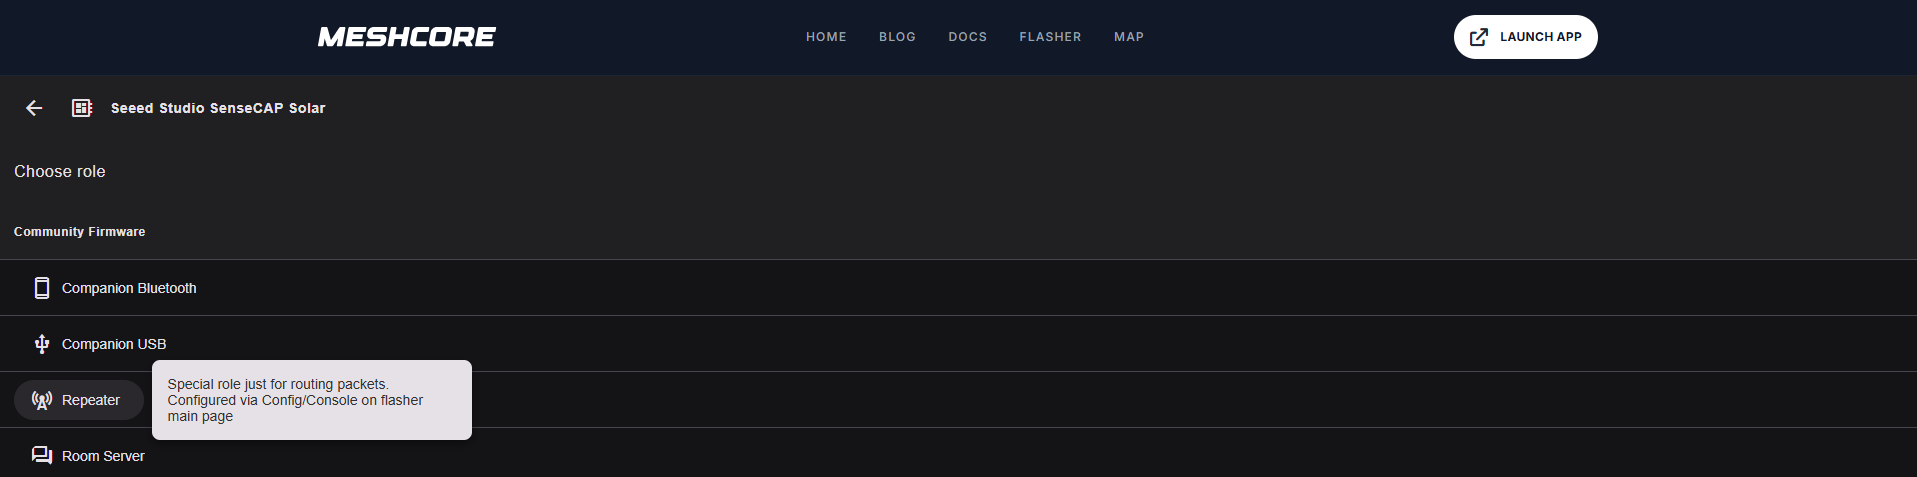
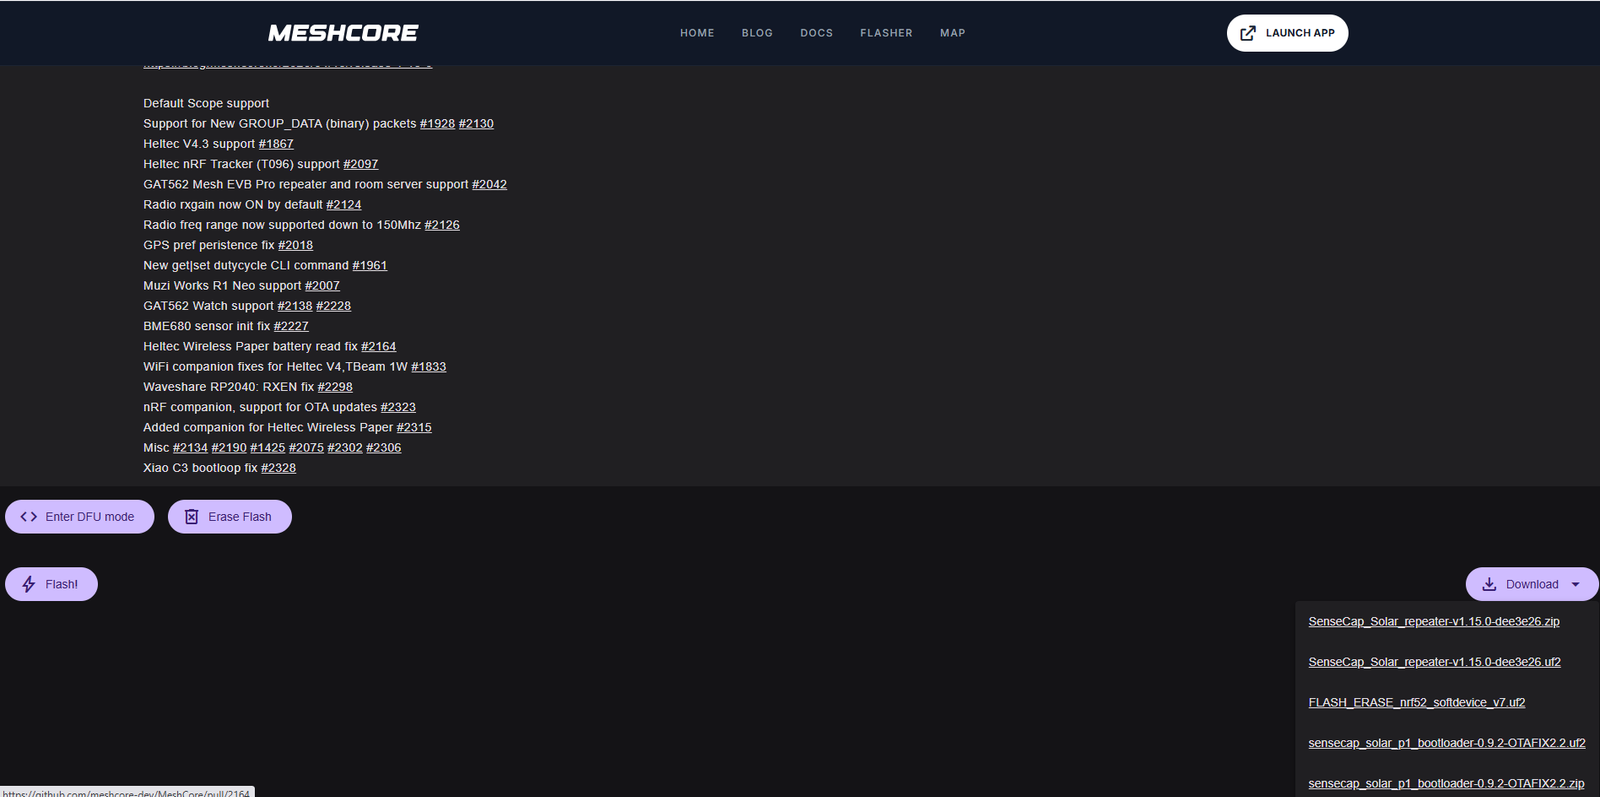
In the download button you’ll see that you can download an OTAFIX file in uf2 format. To flash it, it’s enough to double-click the reset button on the device and when it appears as an external device on your computer, upload the uf2 file. This will update the device and restart it immediately, having updated the bootloader with the patch to make OTA updates work.
Step 2: Perform the OTA Update
Once the repeater is deployed, the first thing you need to do is be close to your repeater. Remember that the update will go over Bluetooth, so you don’t have a very extended range like you would with Meshcore technology on 868MHz.
Open the Meshcore App on your smartphone, and connect to your Companion (not the repeater) via Bluetooth or USB depending on how you have it configured.
Once open, open your Repeater contact and select the “Manage” option.
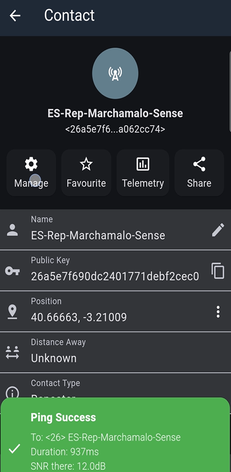
In case you don’t have Meshcore Premium, you’ll have to wait a few seconds to continue.
Once that time has passed, you need to enter the password to access its configuration.
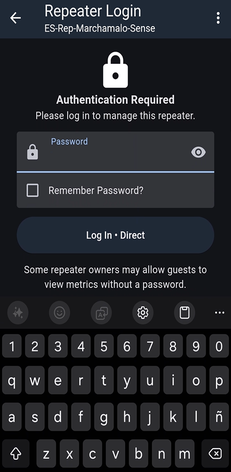
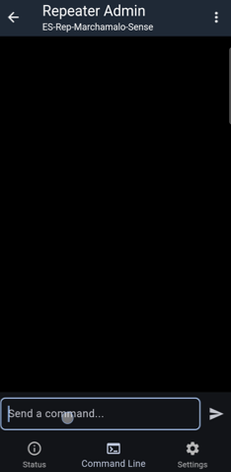
After logging in, at the bottom you’ll see a “Command Line” option, so you can send commands to your repeater.
By clicking on it we can type the command “start ota”, which if successful, will respond with OK – mac: XX:XX:XX:XX:XX:XX
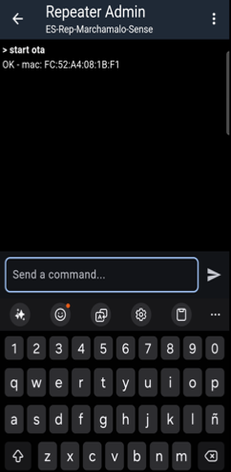
Note: Here I’ve seen that different scenarios can occur depending on the type of device you have. It worked fine for me with DFU – nRF Device Firmware Update.
https://play.google.com/store/apps/details?id=no.nordicsemi.android.dfu
But if instead of responding with the MAC it gives you a URL, you need to connect to the WiFi access point that will have been created and type the URL it indicated in your browser. From there you can upload the file.
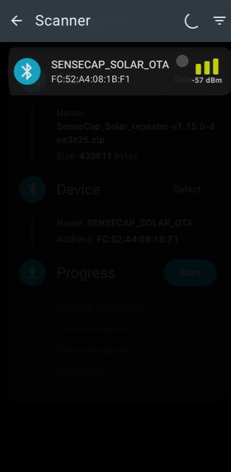
Next we’ll open the nRF DFU App and we’ll see that our repeater node is available.
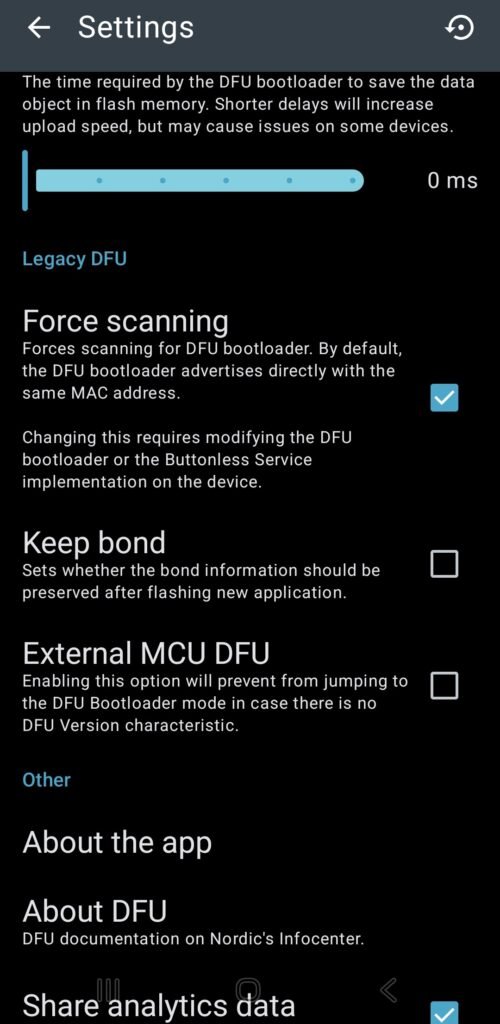
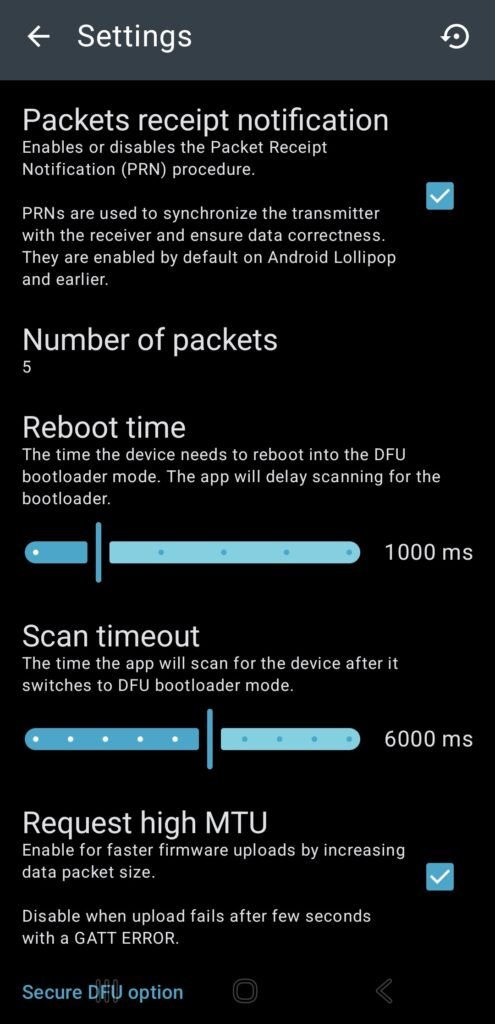
Update: I have received suggestions from users to fix certain errors, so I’m adding this mini-section. I recommend adjusting a couple of settings in the application before launching the update. First, reduce the number of packets from the default of 10 to 5. This will make the update slower since it sends fewer packets simultaneously, but it will make it more robust. Second, enable the “Force Scanning” option to avoid one of the errors I’m about to mention—where you have to launch the update twice for it to work. Thanks to “Builda” and “Recrof” from Reddit for this feedback.
Once selected we can choose the file to upload (which is the one we should have downloaded previously from the official website. Remember it must be a .zip file) and we can click Start to begin the update process. This will make the device boot into DFU mode and retrieve the file to update itself.
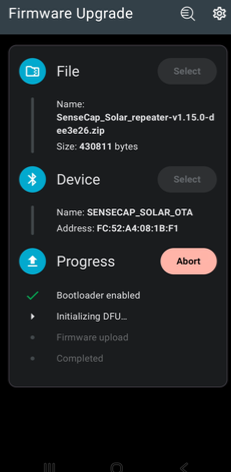
I don’t know if it’s something that happened to me, but it would get stuck on “Initializing DFU” for a while and then the rest would fail.

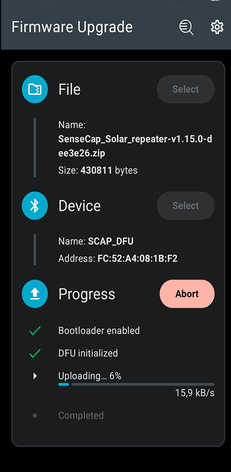
If you simply reconnect in the nRF DFU App and click Start update again, it works perfectly. It must be a bug in the application or the device firmware that makes you need to run it twice.
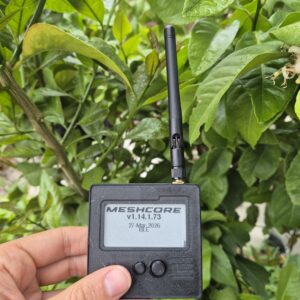
Once finished you’ll be able to use the repeater node with the new firmware. The device will have restarted automatically loading your new firmware.
Conclusion
This is the real benefit of OTA: designing a mesh network without fear of constantly maintaining your repeaters. Updates every 4-6 weeks stop being a logistical nightmare and become something transparent. The workflow we’ve seen here allows you to deploy the SenseCap on a roof and forget about it for years, knowing it will always have the latest firmware.