
In this guide, I will explain how to flash Meshcore firmware onto any device. One thing that people might not know is that most of the devices that are sold with Meshthastic firmware, can be flashed with Meshcore firmware by following these steps.
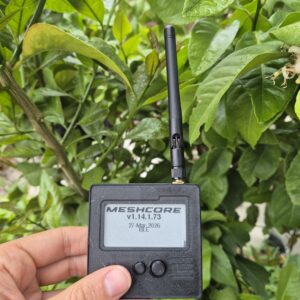
For this guide, I will be using the Seeed Wio Tracker L1 Pro module from SeeedStudio with the preloaded Meshtastic firmware, which is the model I have on hand. This is one of the devices that I was talking about in the previous paragraph. I bought it with Meshtastic firmware, but It supports firmware for both Meshcore and Meshtastic networks.
- Link to buy: Wio Tracker L1 Pro – Meshtastic [Aliexpress]
- Link to buy: Wio Tracker L1 Pro – Meshcore [Aliexpress]
- Link to buy: Wio Tracker L1 Pro + Repeater
Table of Contents
TogglePrerequisites
- A device that supports Meshcore
- USB cable
- Chrome browser. This is the most recommended option; others may cause issues.
Flashing Meshcore
Access to web flasher
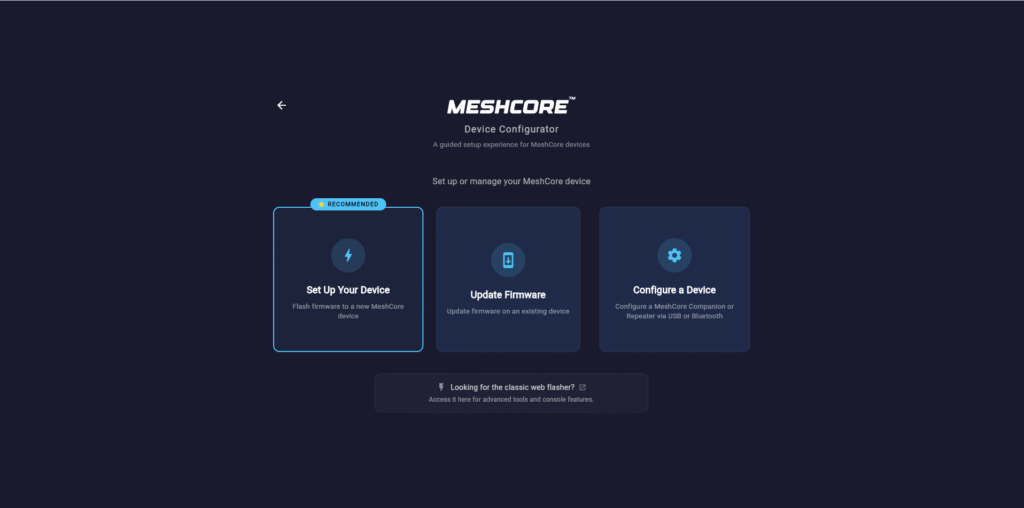
First of all, you must access the Meshcore website to flash the device. There is a configurator tool available to simplify the process. Access it through the following link:
https://meshcore.co.uk/configurator/
On the website, we can set up a new device, update a device with a newer firmware, or even configure it. It is recommended to use the Chrome browser for this. In this case, since we want to flash the firmware, we click on Set up your device.
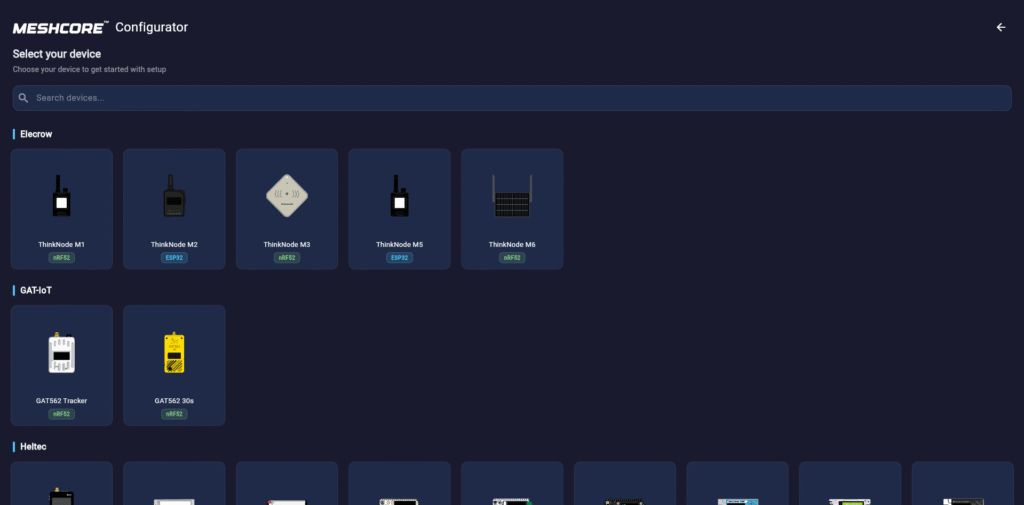
Select target board
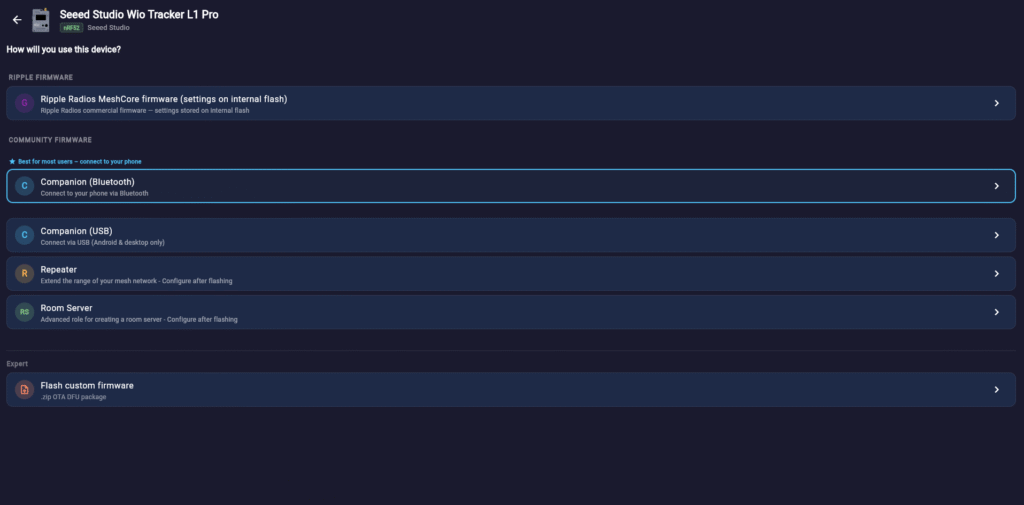
Select role
After selecting it, we will need to choose the role we want our device to play. Remember that in Meshcore, each role—Companion, Repeater, or Room Server—has its own specific firmware.
If you want to know more in detail about what each of these roles does, I recommend visiting one of my previous posts about Meshcore where I explain it more thoroughly. Basically, the Companion role is the one we use to carry the device with us, while the Repeater is for when we want to leave the device in a fixed location for others to connect to.
https://myembeddedstuff.com/meshcore-vs-meshtastic-seeed-studio
In our case, we are going to select Companion Bluetooth, as I find it more convenient to connect it to my phone via Bluetooth rather than USB.
Select firmware
In the following window, we can choose the firmware version; by default, the most recent one will be selected.
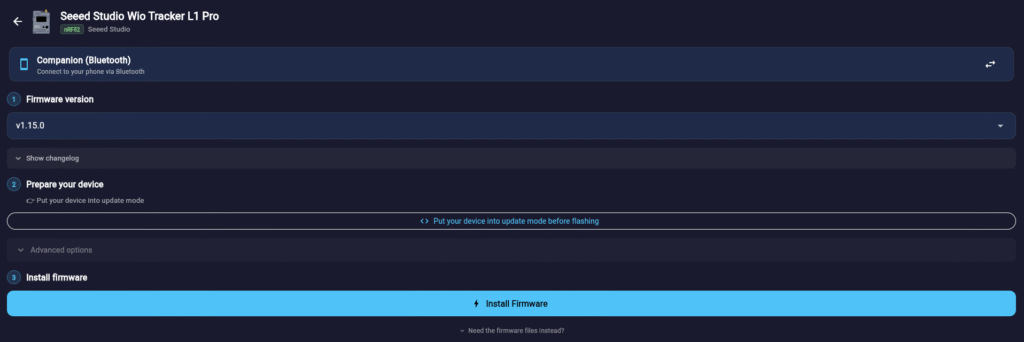
Put device into DFU mode
As the next step, we must prepare the device. At this point, you should have the device connected to your computer via USB.
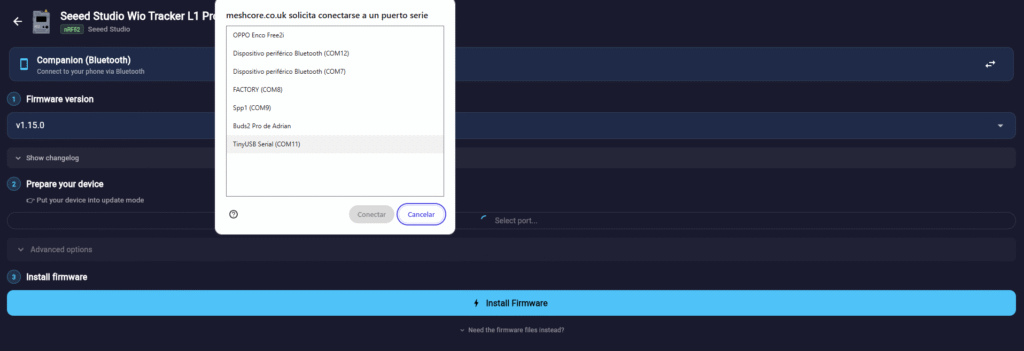
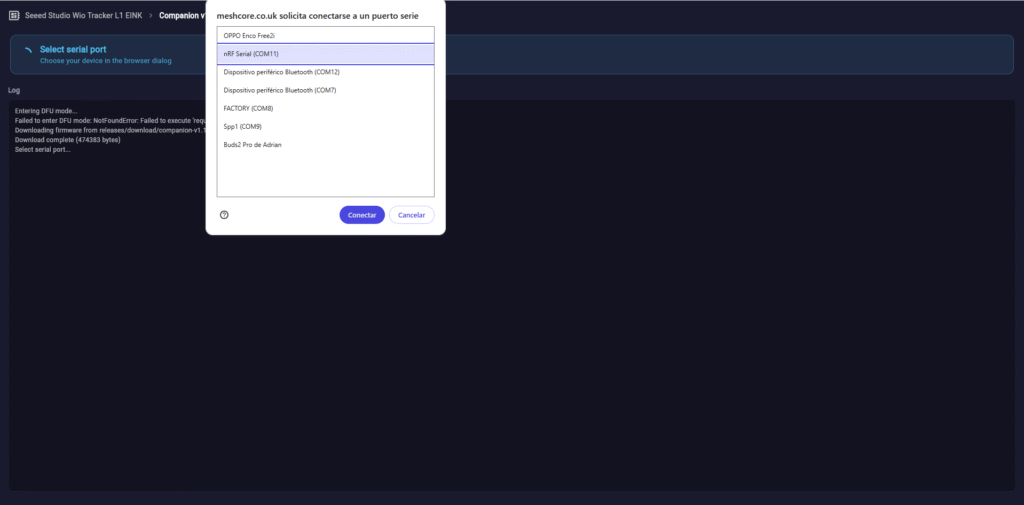
If we click on “Put your device into update mode before flashing”, a popup will appear showing the available serial ports. If you are unsure which one it is, I recommend disconnecting and reconnecting it to see which one is detected. In my case, it is listed as TinyUSB Serial.
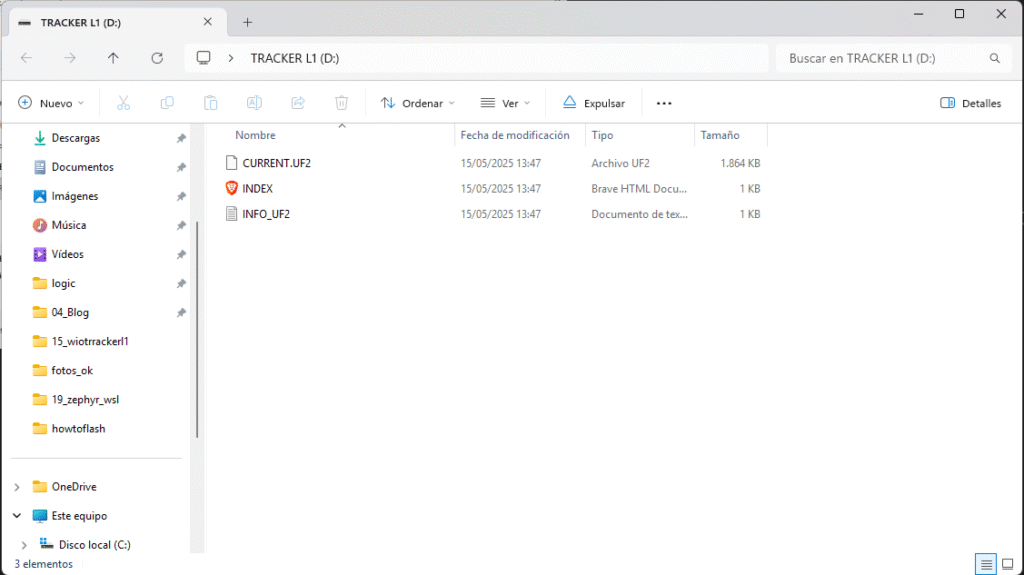
Once we do this, it will indicate that the device is “Ready for update”, and we will even see it listed in the file explorer as a new storage device. This is because the device is running its bootloader, which simulates a USB-accessible file system to allow the upload of the update file. The update process works by uploading the compiled firmware file (with the .uf2 extension) to its internal memory; upon restarting the device, the bootloader checks if a new .uf2 file is present. If it finds one, it will proceed to update its application firmware.
Note: If for any reason the web configurator fails to detect your device automatically, you can force the bootloader mode manually. On most of these modules (including the Wio Tracker), a quick double-tap on the Reset button should do the trick.
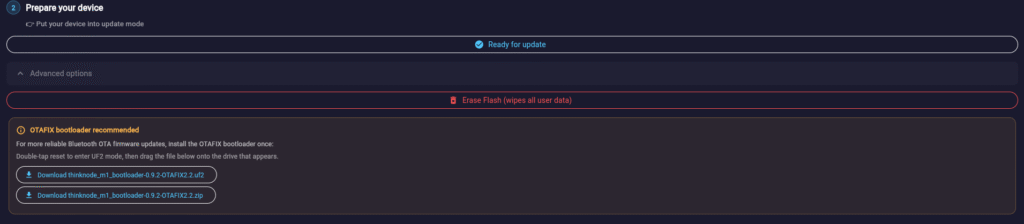
Erase flash (optional)
As a recommendation, before uploading a new firmware—especially if you are coming from Meshtastic—I suggest going into the advanced options and performing a “Erase flash” first.
Additionally, I recommend flashing the OTAFIX bootloader beforehand to enable OTA (Over the Air) bootloader updates with bug fixes. Simply download the .uf2 file and copy it into the device’s file system. This is extremely useful for repeater nodes, as they are likely to be installed in areas that are not easily accessible; having the ability to update them remotely when important updates are released is a major advantage.
Flash firmware
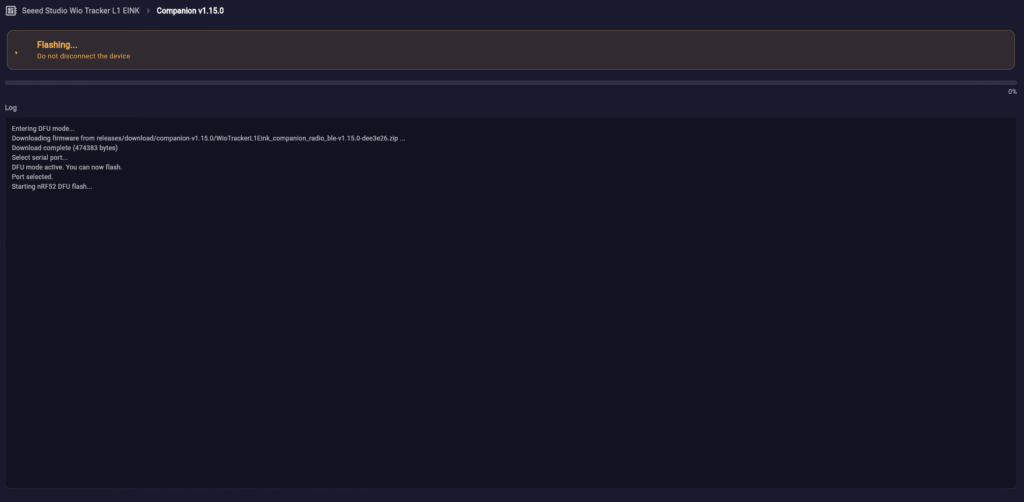
Once that is done, click on Install Firmware.
Wait for the firmware to flash.
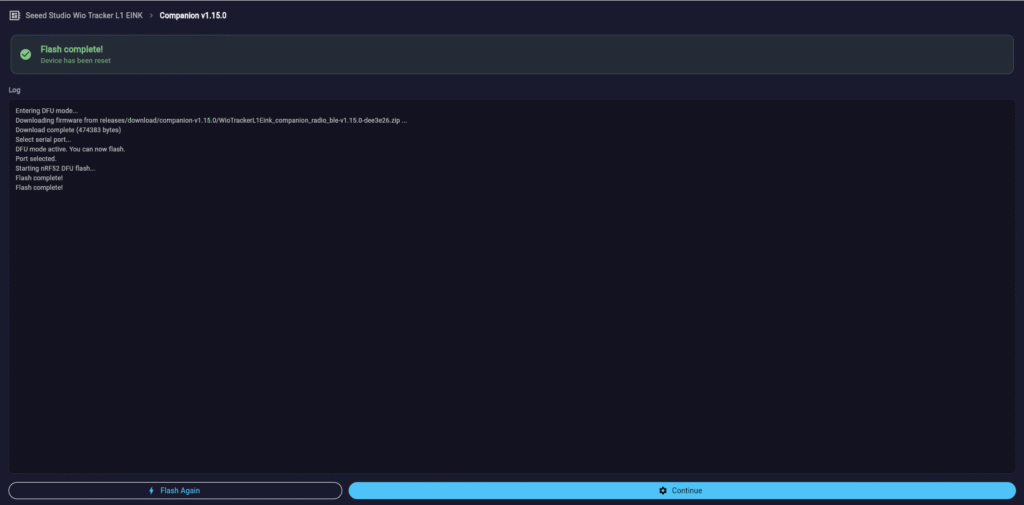
Once flashed, it will indicate that the update is complete, and our device will have rebooted and will be running the corresponding firmware.
Switching from Meshtastic to Meshcore.
- Perform a Full Flash Erase: Ensure you erase the flash memory previously so the device doesn’t retain any information from the other network that could cause conflicts.
- Bluetooth Pairing: If you are going to connect the device via Bluetooth to the same smartphone, you will likely need to “Forget” the device in your phone’s Bluetooth settings. The pairing key will change, and your phone won’t recognize it until you clear the old connection.
Next steps
Now that you have the firmware running, the next step is to download the Meshcore mobile app, which is available for free. Once installed, you’ll need to set up your device by adjusting the RF settings to match your local regulations and environment.
I highly recommend checking out the Meshcore Map to see the active repeaters in your area and, more importantly, to verify which configuration they are using so you can ensure your node is perfectly synced with the local network.
Troubleshooting
Serial Port Not Found
Issues with the Web Flasher
Regarding the tool itself, the main thing to keep in mind is the browser. You should use Google Chrome exclusively for this process. Other browsers like Firefox or Safari may not be compatible with the web flashing technology, which will inevitably lead to errors during the process.

Pingback: Deploying a Meshcore repeater. How to perform OTA updates on NRF devices. - myembeddedstuff.com